Best Race Drone for FPV Racing : FlightClub Tokio Build
Best Race Drone for FPV Racing : FlightClub Tokio X Build
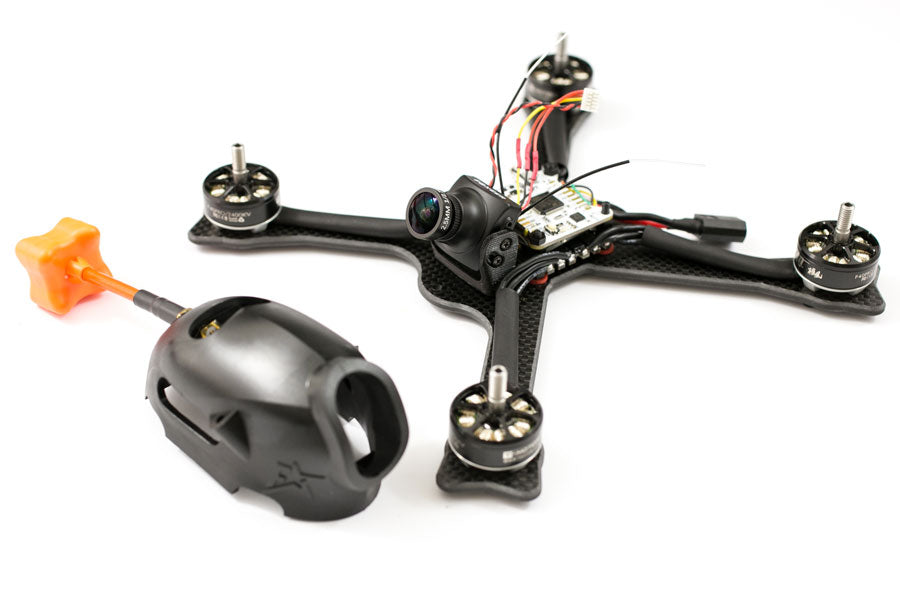
Time to build the best race drone available, the FlightClub Tokio X.
Of all the quads I’ve build, the Tokio is the best race drone I’ve ever built. When I designed the frame I wanted it to be easy to build and easy to work on in the field. What makes this frame so good is all the small details that were put into designing the frame. See the FlightClub Tokio X post for all the features and design log.
Building the Tokio X and Tokio SX will be exactly the same. The only difference is the motor wires on the SX will be slightly longer due to it being 220mm vs 210mm on the X. The best race drones for 5″ props are all in the 210 – 220mm range.
 Tokio X Build List
- FlightClub Tokio X or SX
- Lumenier LUX v2 Flight Controller
- Tmotor F40 Pro 2400kv
- FrSky XSR
- Cicada 35A 4in1 ESC
- Foxeer Arrow V3 using the optional TPU Flexible camera mount
- FX799t 200mw VTX
- Lumenier AXii LHCP antenna
- HQ Props 5x4x3vs1 or GemFan 5152 tri-blade props
- FlightClub 4s 1500mAh Graphene Punch Pack pack
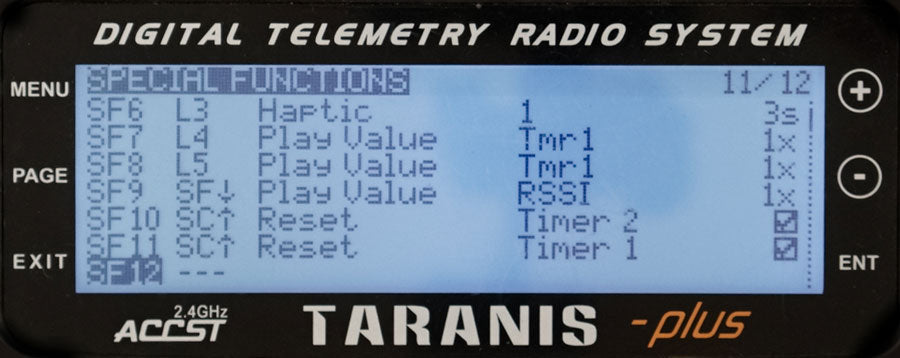
- Taranis X9D Plus
- Tokio GoPro Canopy
Tokio Build kit available also. Kit includes the Taranis program file, Betaflight backup, cheat sheet and all the misc parts needed for this build.
Injection Molded Canopy
The best race drone is about to get better. We are in the process of getting the canopy made by injection molding. The canopy used in this build is the first prototype of the new canopies. Right now we are including a 3D printed canopy in black. Once we have the injection molded canopies we will give a free upgrade to everyone that has a 3D printed one to the new injection molded canopy in six possibly seven color options. Right now the colors will be black, red, blue, orange, purple, maybe white and clear. Clear will be awesome for customizing. Put a comment below if you have any thoughts on the colors available. All you have to do is pay for shipping. That’s a win-win deal!
LUX v2 Flight Controller
These days the software for flight controllers are so good it really doesn’t matter which board you choose. I may get some heat for saying this or I’m just not a good enough pilot to notice a significant difference. I’ve tried KISS, Revolt and LUX v2 on the Tokios and they all fly almost exactly the same. Once they are tuned you can’t tell the difference in hardware. The Revolt flew good and felt exactly like the LUX. When it comes to the install the Revolt was a pain in the butt because it requires 5V and vbat. So when you are building the best race drone it comes down to choosing a board that’s reliable and easy to install.
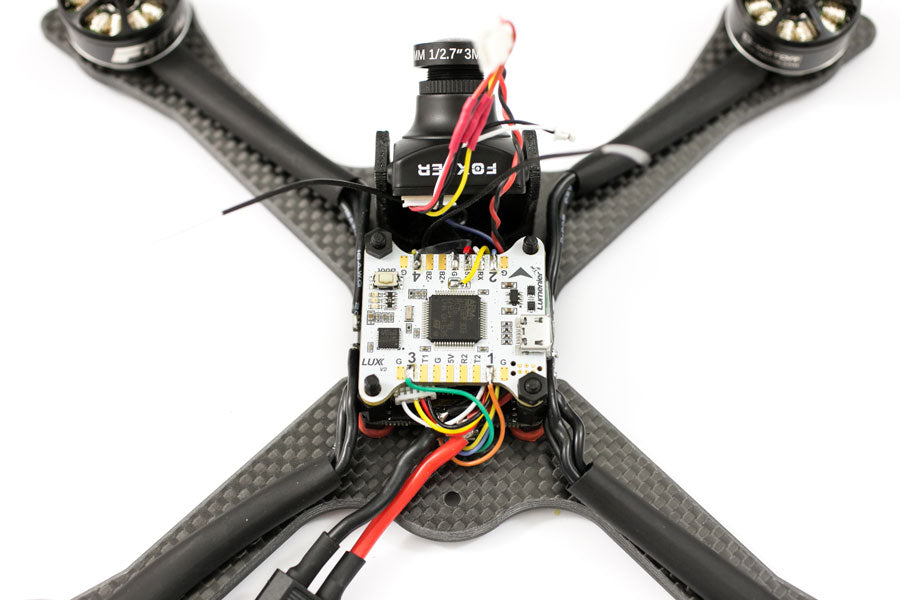
I’ve build around 6 Tokios using the LUX v2 and they have all been rock solid. They all fire up smooth as butter from the very first time. I’m sure Butter Mount has a lot to do with it. Butter Mount is a new way of mounting the flight controller that I invented that eliminates vibration issues on the flight controller. The only LUX that has gone out on me was the one I got stuck in a tree. I damaged the LUX while repeatedly stabbing it with a fiberglass pole trying to get it out of the tree. I consider that user error. I really like the layout on the LUX also. Once you select the voltage for the RX and connect the power on the bottom, all the other pads you need are on top. This makes it super easy to setup.
Cicada 35a 4in1 ESC
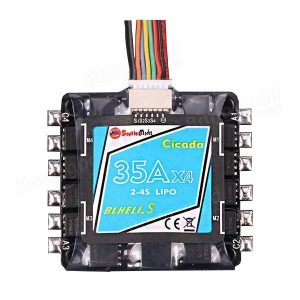 I promise, once you learn how to build with a 4in1 ESC you won’t go back to building the traditional way with one ESC on each arm. There are several advantages to using a 4in1. The biggest advantage is ease of install. The traditional way of installing 4 individual ESCs you have to use a PDB and solder 10 power wires (a positive and negative for each of the 4 ESC then a battery cable). Not to mention the ESCs have to sit in the danger zone on the arms. I can’t tell you how many ESCs I’ve had to replace due to prop strike. All these extra wires and ESC placement makes it harder to build clean.
With the Cicada 35A 4in1 you can build super clean and fast. The only power wire needed is the battery cable. No need to power each ESC individually because they are all on the same board as the battery cable. This eliminates the need for another board, the PDB. On the Cicada 35A there is a small positive and negative pad you can use to get battery voltage to any other components. The Cicada 35A 4in1 come flashed with at least 16.5 BlHeli firmware so they are Dshot600 ready from the start. Since we are using the LUX v2 it supports pass through. This allows you to connect to BLHeli from the LUX’s USB to do any ESC flashing or reversing motors. This is great because you don’t have to worry about which motor wires need to be crossed or now.
Tmotor F40 Pro 2400kv
The Tmotor F40 Pro 2400kv are my favorite motors right now and probably the best race drone motors available right now. They have proven to be ultra durable, efficient and powerful. I chose the 2400kv over the 2600kv for the efficency. The choice of motors should be determined by the type of racing you’re doing. For normal racing where you are trying to get the most laps possible in a 2 minute race you’ll want a powerful but efficient motor like the Pro 2400kv. If you make it to the final heads up race where the first person to finish 3 laps wins, you’ll want a super powerful motor like the 2600kv.
FlightClub Graphene Batteries
It doesn’t matter if you have the best race drone or now. If your batteries can’t meet the demands of your motors you will still lose the race. If you put cheap gas in your Ferrari you won’t get the most performance out of the machine. Same thing with batteries. These graphene packs are by far the best batteries I’ve used. We’ve run these 4s packs down to 8v before with no puffing or degradation in performance. The are low profile and lightweight also
Other Recommended Parts
- Weller Digital Soldering Iron – This soldering iron is my workhorse that I’ve had for at least 15 years. This is the solder I use.
- DeWALT Gyroscopic Power screwdriver – I freaking love this tool. Makes building and changing props a breeze. It saves time by not needing to change the spin direction. Simply tilt it the way you want it to spin and the speed increases or decreases by how much you tilt. Get this nut driver set, it makes changing props super fast.
- FrSky M9 Taranis Gimbals – Before I upgraded my gimbals I thought these were just longer lasting gimbals than the stock gimbals. Boy was I wrong. These gimbals are so smooth and have a much better feel than the stock gimbals.
- Soldering Vise – Makes soldering easier
- Taranis Program File – Take the hassle out of programing your Taranis. Load this file and everything on the Taranis will be setup already.
- 12v Pololu – Cleans up the video signal and protects the VTX from voltage spikes.
Lets Start the Best Race Drone Build
Best Race Drone Build Summary
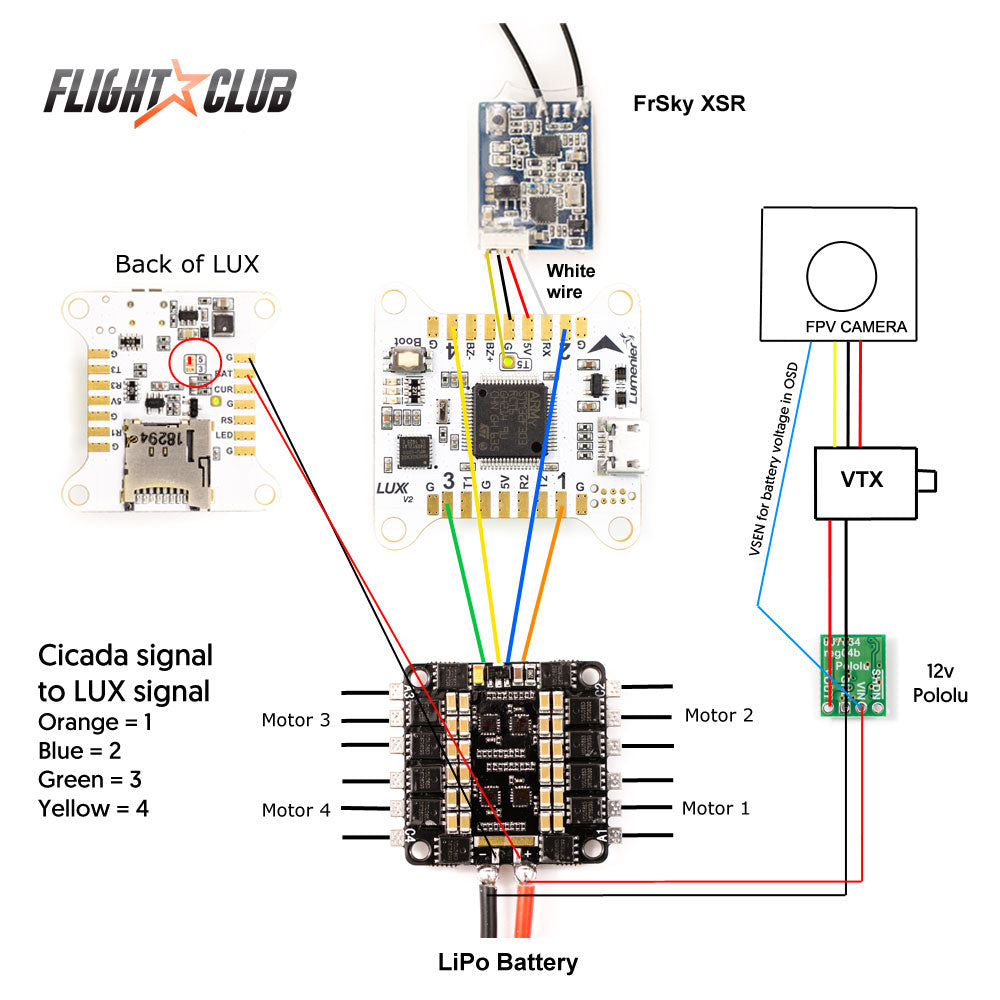
Since we are using the Cicada 35A 4 in 1 ESC, it will act as the PDB also. The small positive and negative pad next to the battery can be used to power the LUX directly and VTX equipment. The motor wires can be mounted in any way. It doesn’t matter if they are initially spinning the wrong direction because since we are using the LUX v2 it’s very easy to connect to BLHeli to reverse any motors.
Make note of the side of the Cicada that is facing up. If you have the battery cable side facing down instead of facing up like in this schematic the ESC signal to LUX signal will not be like in this diagram. Once again, the signal ground is not needed. It shares a common ground with the battery ground so trying to connect the signal ground is redundant.
To get the best possible image and protect the VTX from voltage spikes, run the power through a 12v regulator like the Pololu. The Pololu will power the VTX and the 5v out from the FX799t will power the Arrow V3. If you want battery voltage to show in your OSD, connect the blue VSEN wire from the Arrow V3 directly to the positive lead of your battery.
Let’s start the Build
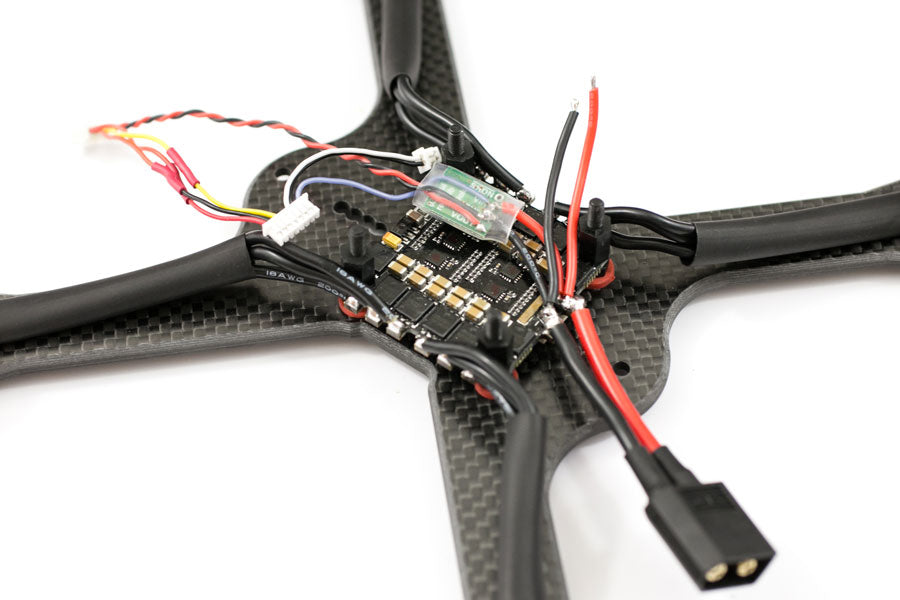
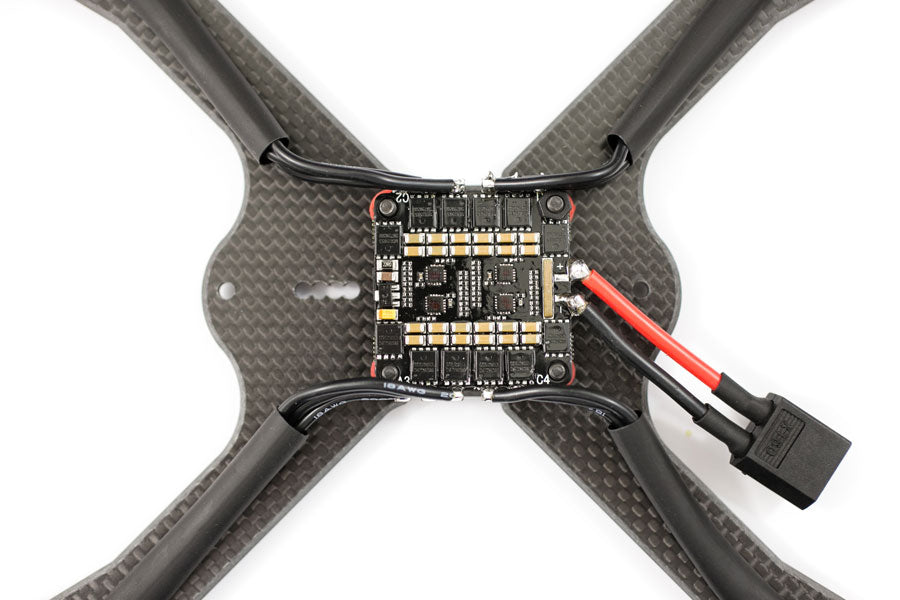
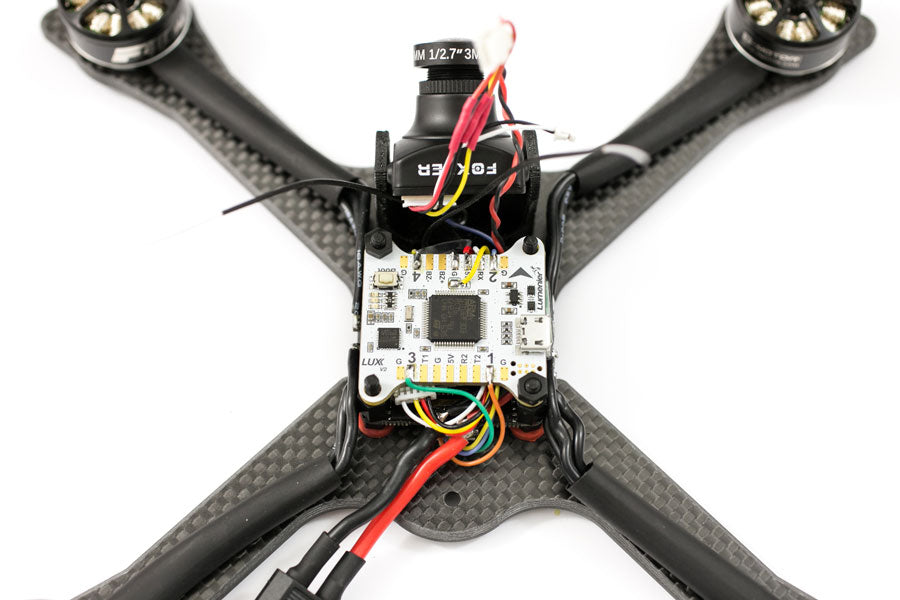
Since the Tokio canopy screw mounts on the back, the battery cable needs to be unsoldered and moved about 45 degree to the left. Make sure the battery plug side is up, otherwise the ESC signal to fc wiring in the schematic won’t work.
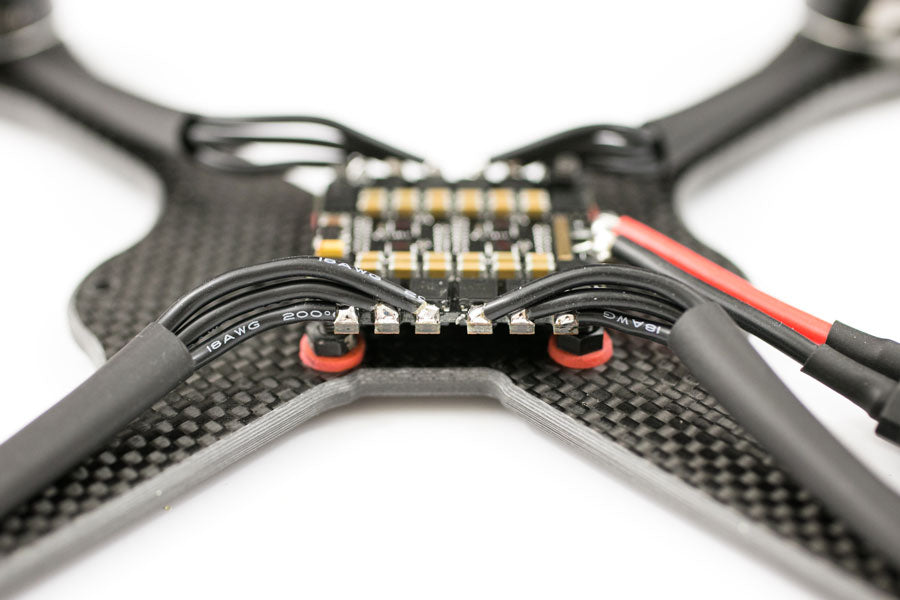
Cut the motor wires and wrap the wires in heat shrink. The motor wires on the rear motors will be slightly shorter than the front motors because the flight controller is mounted slightly back. Solder the wires inline with the ESC front and back. Otherwise canopy will not be able to mount. It doesn’t matter how you solder the motor wires on the ESC. We can reverse any motors later in BLHeli.
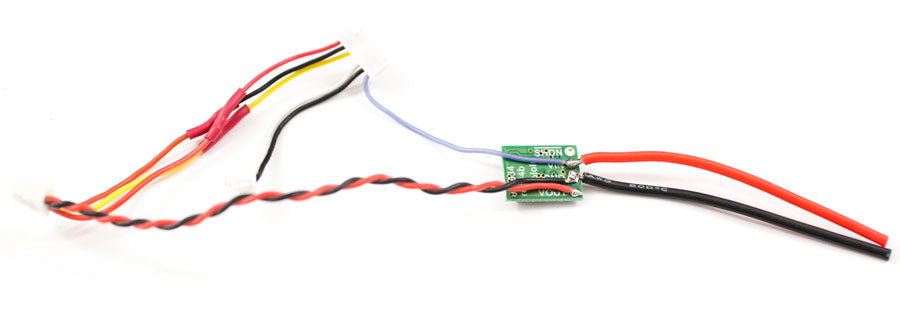
The best race drones must have a clean image if you want to win. Prepare the 12v Pololu like this. The Vin is coming directly from the battery along with the VSEN wire going to the Arrow V3. This will give you the battery voltage in the OSD. The Vout goes to the FX799T. Solder a wire on the battery to power the LUX.
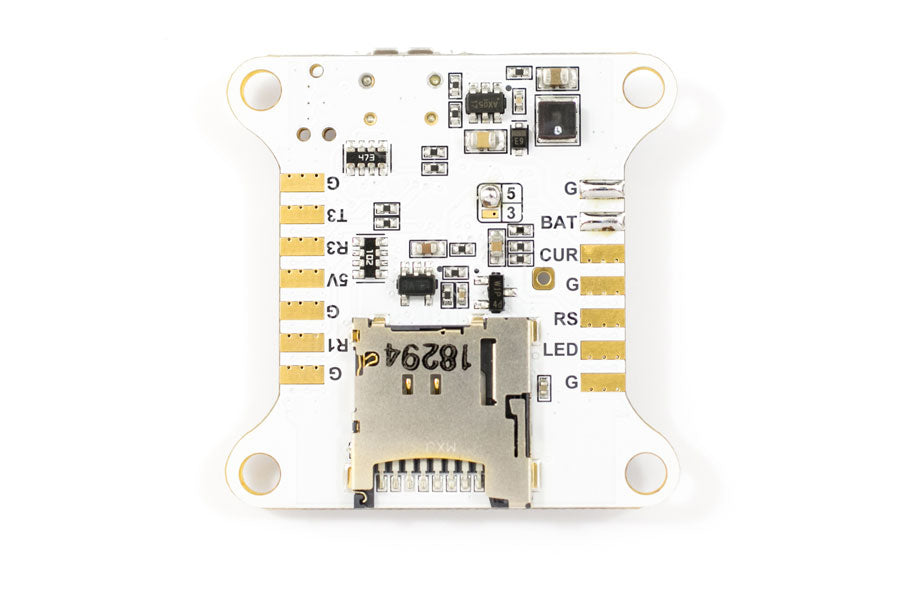
Jump the 5V on the back of the LUX because we are using the FrSky XSR.
Solder the BAT and Ground on the LUX direct to the battery. Solder the wires on the XSR to the LUX. Once that’s done you can mount the LUX on the frame and install the ESC signal wires to the LUX. Refer to the diagram above on how to connect the signals.
Taranis Setup
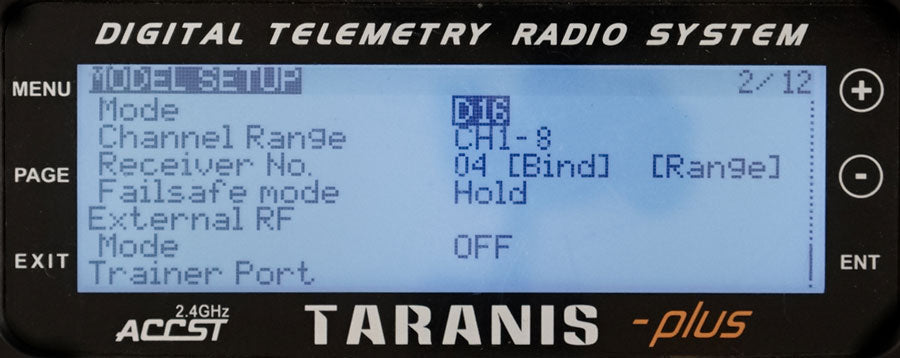
For the sake of keeping this build post shorter, I will only show how to set up how to arm the quad to go fly. For the full setup you can see my other builds where I show how to set everything up. Or you can get the full Taranis Program files here. This will have everything setup for you.
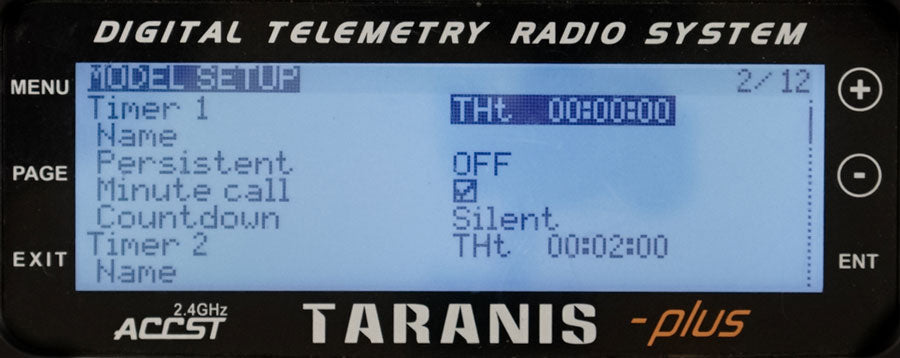
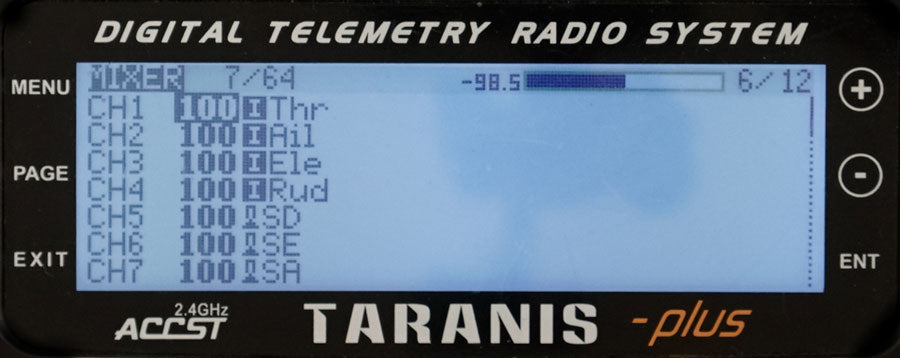
Press Menu and page down to the Mixer page, 6/12. Highlight CH5, press and hold enter, select edit. Go down to Source and press enter. Flip whatever switch you want to assign as your arm switch. I’m using the SD switch. It’s easily accessible but not so easy that I’ll accidentally flip it on if I’m bending over to pick up my quad.
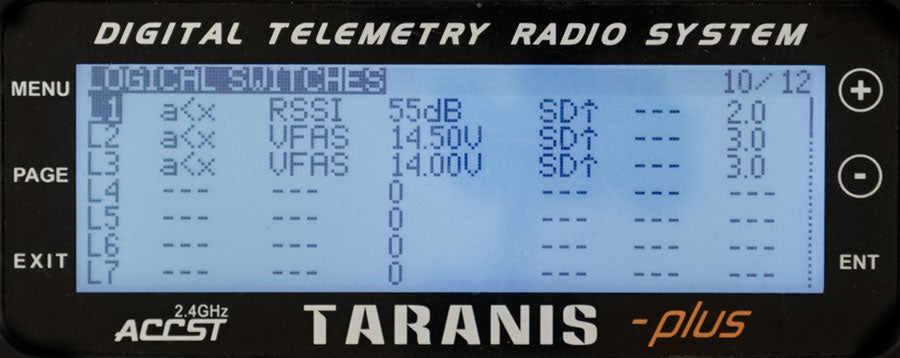
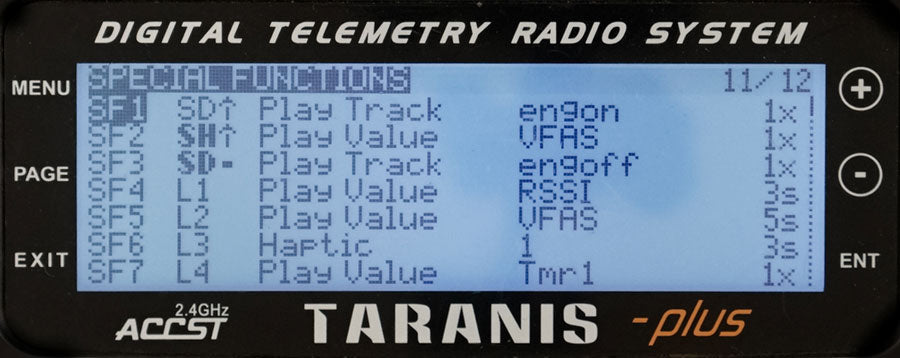
Here are my other screens for Telemetry, flight timers, warnings and switches.
BetaFlight Settings
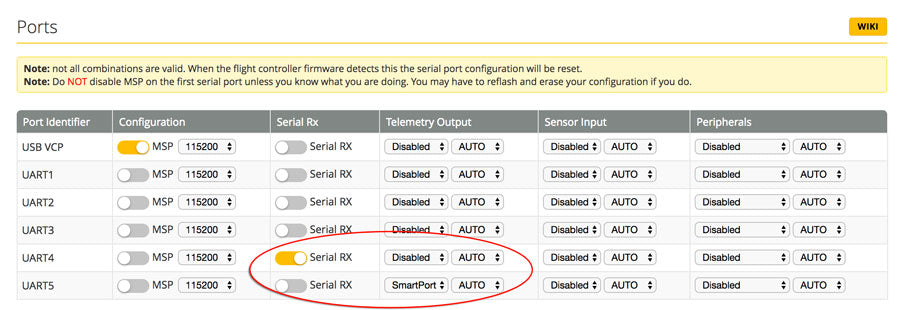
To get the XSR to work on the LUX you must configure the ports like this. Enable Serial RX on UART4 and SmartPort on Telemetry Output on UART5. If you don’t see VBAT in your telemetry it’s because Smartport is not enabled.
Configurations
The Cicada 35A come flashed with at least 16.5 which are Dshot ready. To get Dshot all you have to do is select the DSHOT600 protocol. If this part is not set up correctly your motors won’t arm.
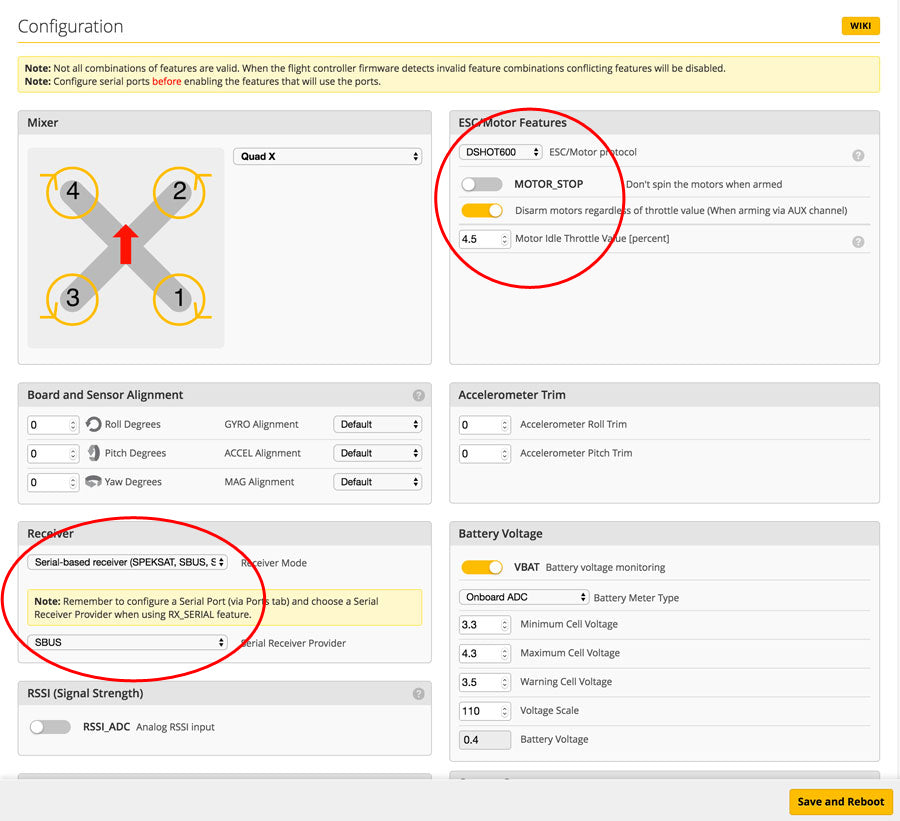
I turn off the Accelerometer. This allows me to arm the quad when the quad is not level. Handy if you get stuck upside down in a tree 🙂
Turn on TELEMETRY, this will let you monitor the battery and RSSI from your Taranis.
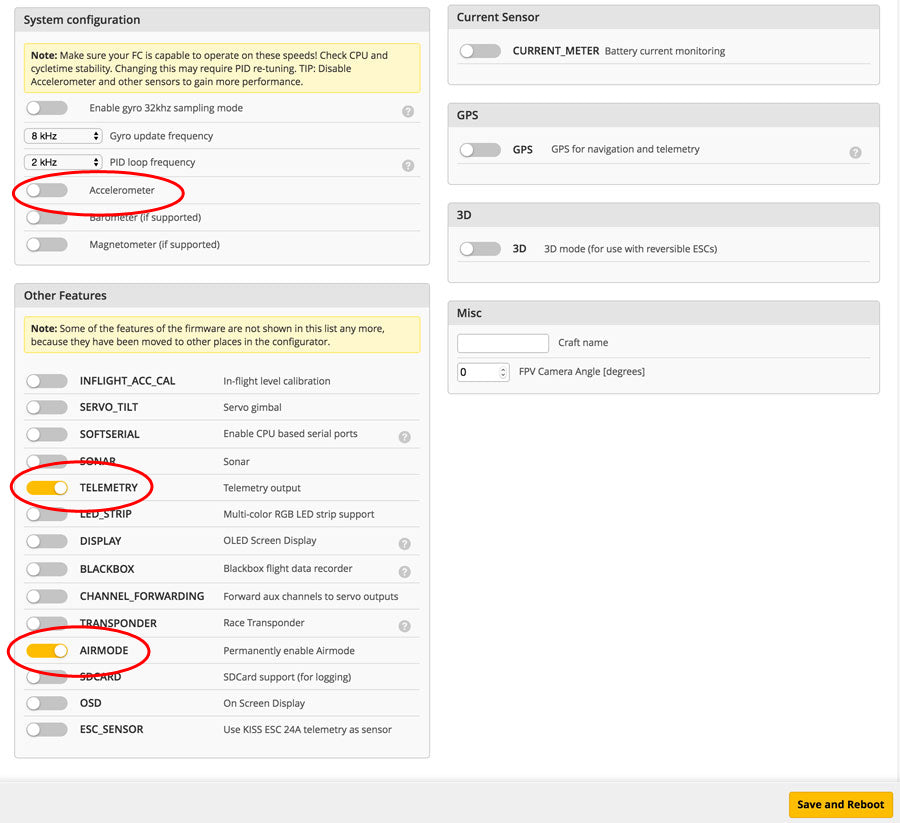
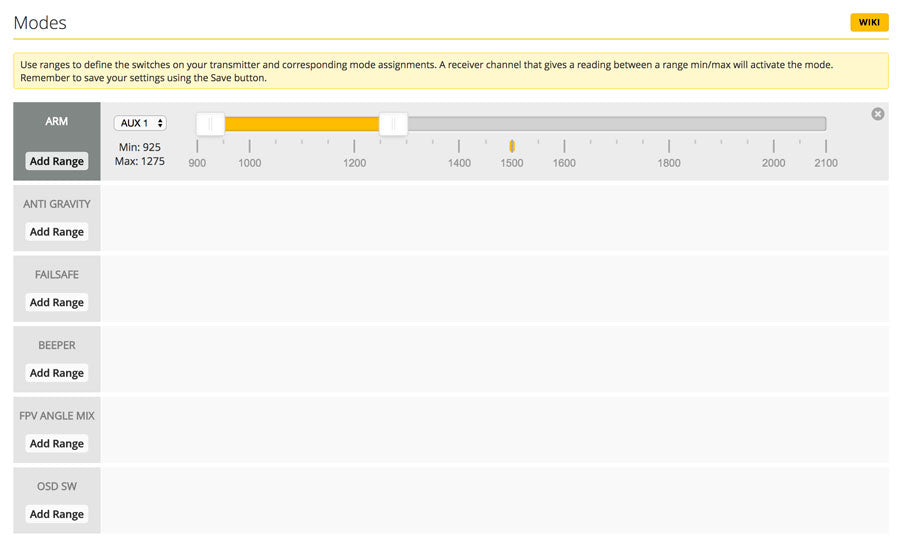
Setup the arm switch according to whatever switch you assigned to AUX1 on your Taranis.
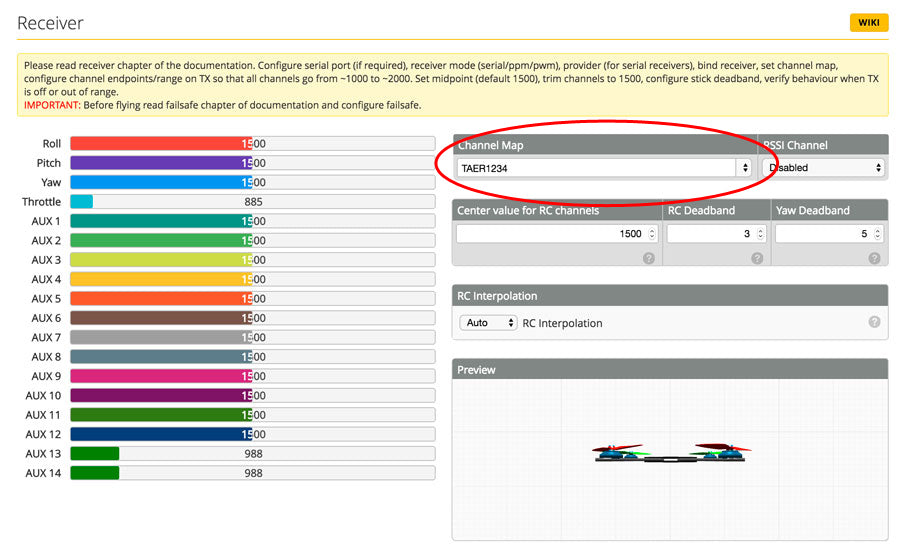
On the Receiver screen all you have to do is change the channel map to TAER1234 for Taranis.
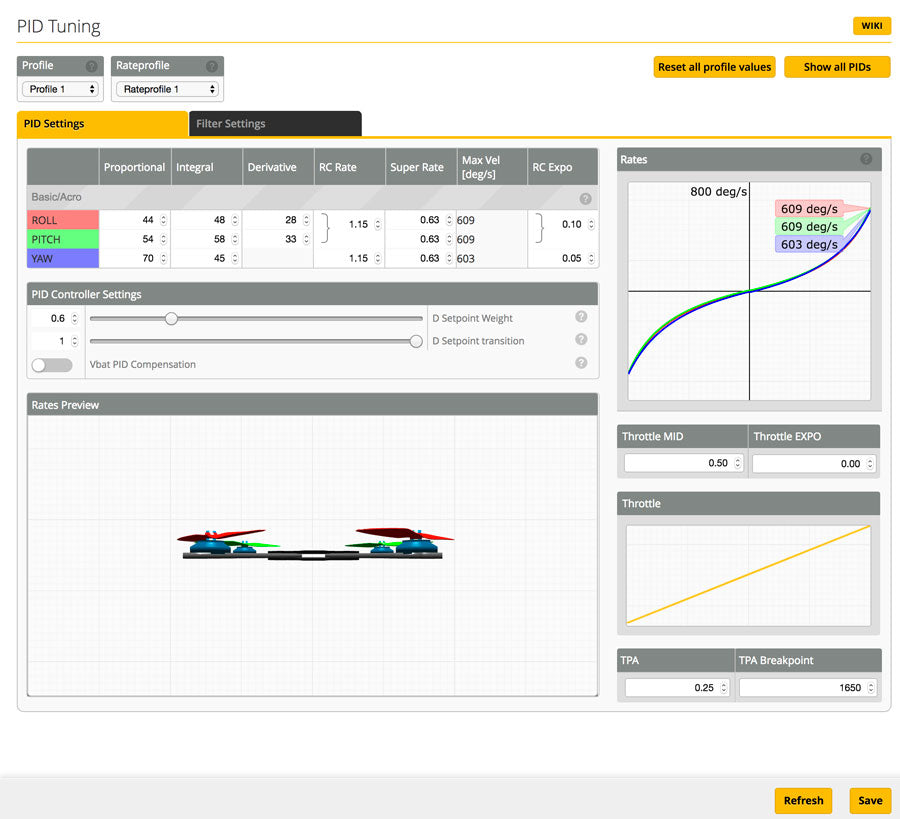
Here are my PIDs for the Tokio X running these components. Tuned with the GemFan 5152 and a 4s 1500mAh Graphene pack. The rates can be adjusted to your liking. Increase the RC Expo if you want a softer, less reactive center stick. Lower the expo if you want a more linear sensitive center stick. The best race drones are usually setup with around 500 deg/s roll and pitch. Mine is set up a bit higher than what’s suggested because I like to fly with a mix of race and freestyle.
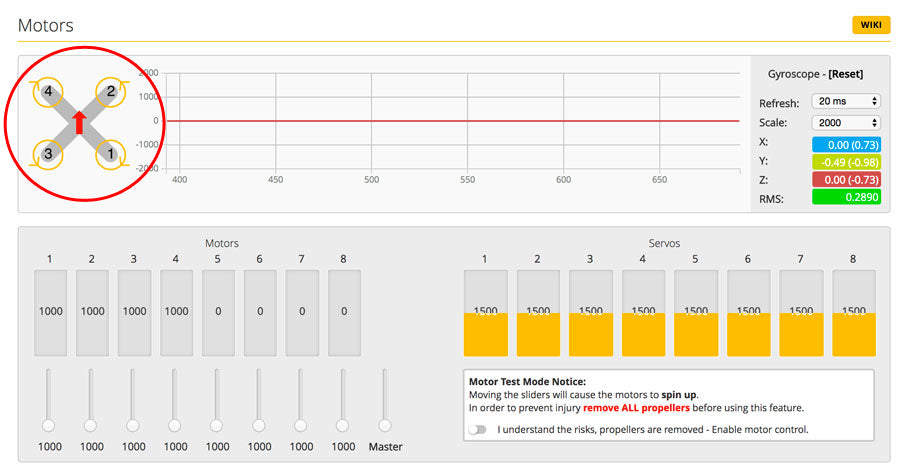
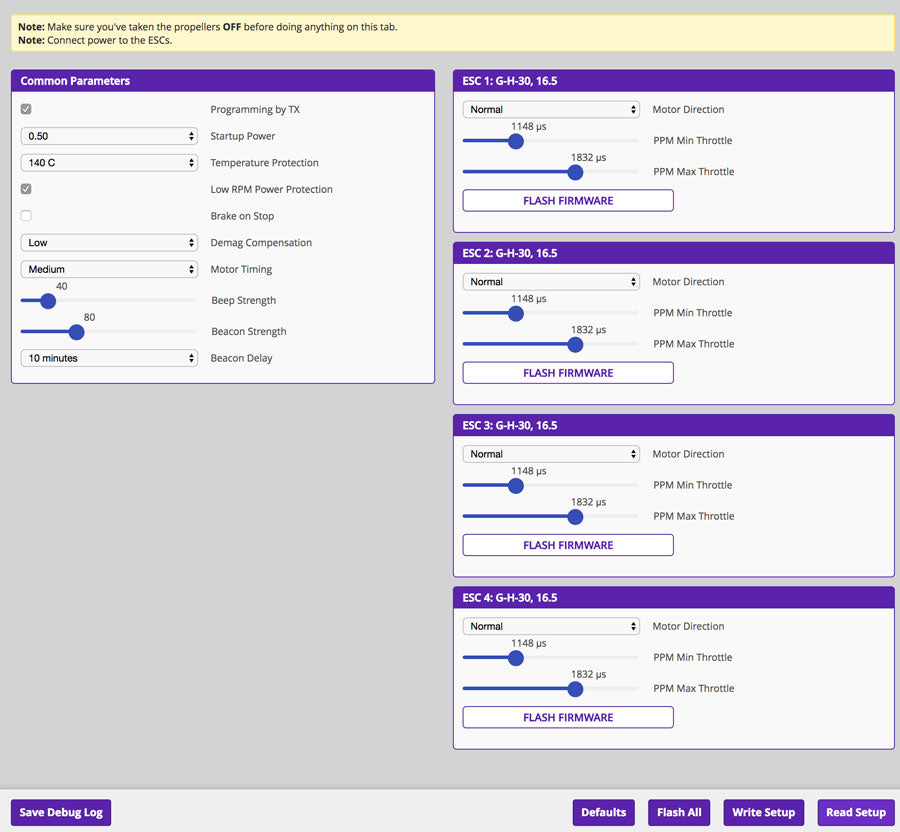
Since we are using Dshot600, ESC calibration is not needed. Use this screen to test if you have the correct ESC signals connected on the flight controller and verify all the motors are spinning in the correct direction. If any of the motors are not spinning in the correct direction use BLheli software to reverse the motor.
Since we are using the Lumenier LUX v2 with the 35A Cicada, it supports BLHeli passthrough. All you have to do is connect the USB on the LUX and use the BLHeli configurator.
BLHeli Configurator
- In the Chrome App store, add the BLHeli Configurator to Chrome. Since you already downloaded the CP210X and VCP drivers for Betaflight you don’t need to do this again. It should connect as is.
- Open the BLHeli configurator and plug in the USB on the LUX and battery to quad.
- Click Connect at the top right on the configurator. Then Read Setup on the bottom right.
- Flash the ESC to a different firmware if you’d like.
- Select the ESCs that need to be reversed, if any.
- When you are done with the settings click Write Setup on the bottom. You will hear a restart chime, done!
Once you have the ESCs setup correctly you can finish building the rest of the quad. Install the VTX in the canopy. Watch the video on how to mount the canopy on the frame.
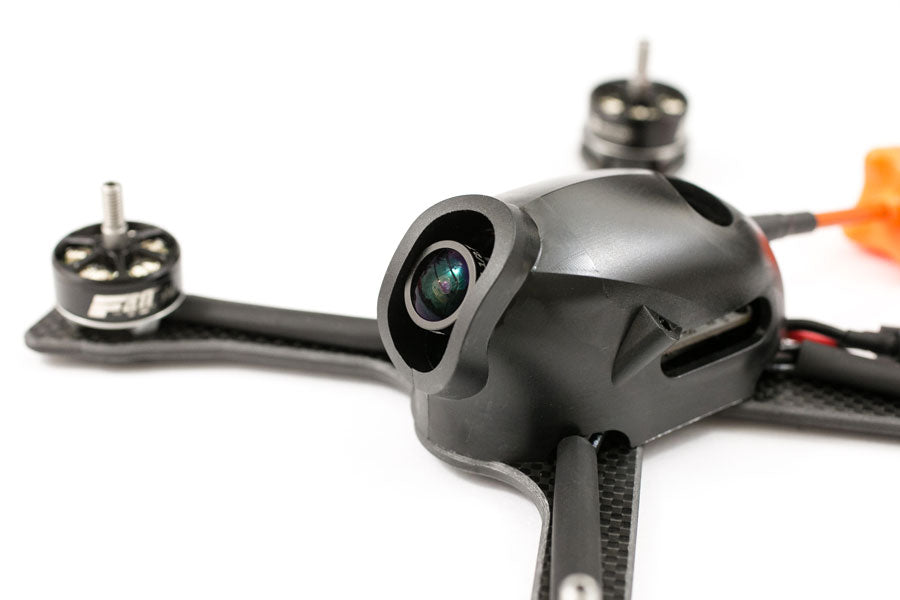
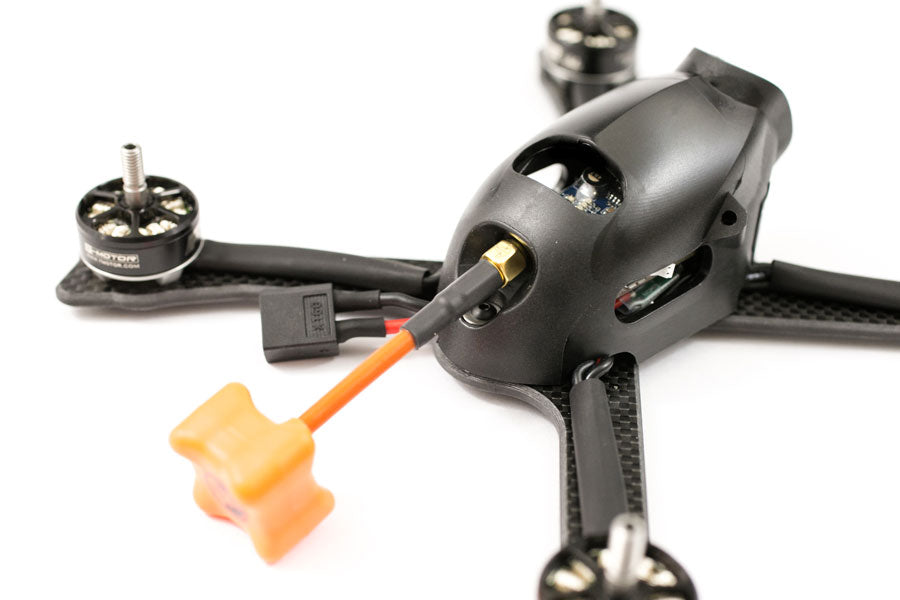
Put the SMA through the hole in the canopy and screw on your antenna and mount the camera. I’m using the optional flexible TPU mount for the Arrow V3. The metal mount that comes with the Arrow v3 is too short. The flexible mount is great because unlike the metal mount you never have to bend it back into place after a crash. It just flexes and goes back into position. The mount is thick enough to where there’s no vibration in the video.
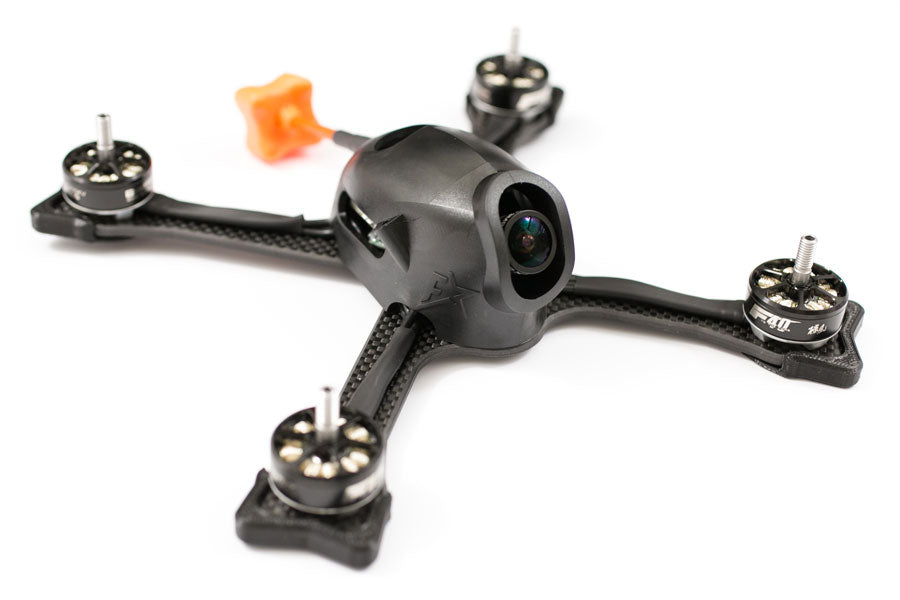 Time to Rip!
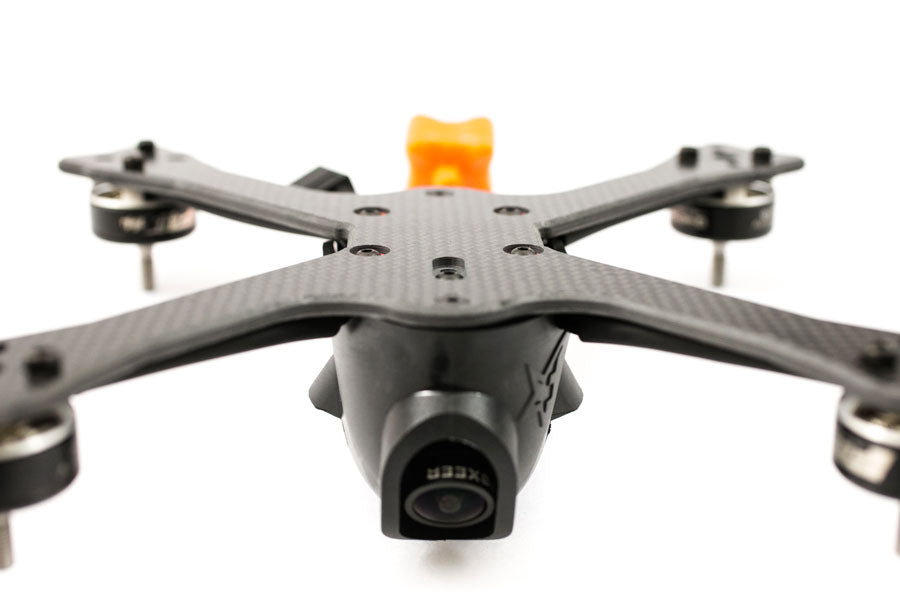
As you can see this is a very easy quad to build. Besides the programming the physical build of the Tokio is super easy. I think that’s one of the things that makes it the best race drone.
Join the FlightClub group in FaceBook.
If you found this post helpful, it would be super cool if you purchased the components from my store or purchase items from my Amazon links. These posts are expensive and take a loooong time to make so the purchases make it possible for me to keep making them. Thanks in advance, I greatly appreciate it 🙂

