FrSky X4R-SB and XSR Setup
The FrSky X4R-SB has been out for a while but the XSR was just release. What makes these two receivers so great! Let’s take a look.

The XSR-SB and XSR both use a newer technology SBUS vs PPM (CPPM) on the D4R-ii. SBUS is digital where as PPM is analog. Since PPM is analog, the error checking process takes longer because it has to check values from 0-100. SBUS has a delay of about 10 – 20ms where PPM is around 60-80ms. 50ms doesn’t sound like a lot but if you are flying 80 mph it could mean the difference between clipping a prop or smashing into a tree. Game over.
The good thing is that Telemetry (RSSI, battery…) info is still sent in the SBUS stream just like PPM. So if you are using something like the OSDoge everything works the same.
How to setup SBUS on the X4R-SB AND XSR
Setting up SBUS on the Naze32 is very easy. The Naze32 rev6 has a built in SBUS inverter so it’s nearly plug and play.
Connect the negative and positive from the RX to the GND and +5 on the Naze32. The SBUS signal goes to pin 4 U2RX/4 on the Naze32.
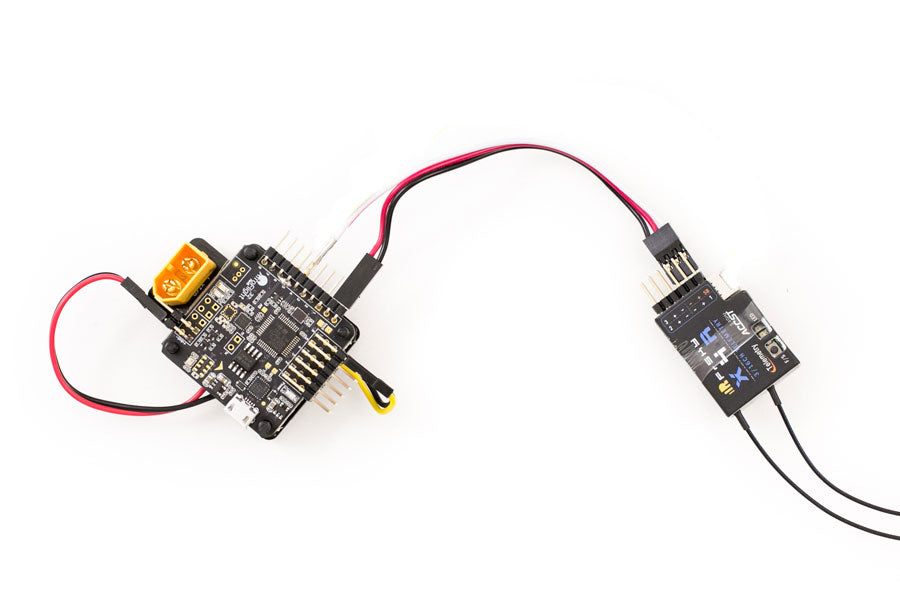
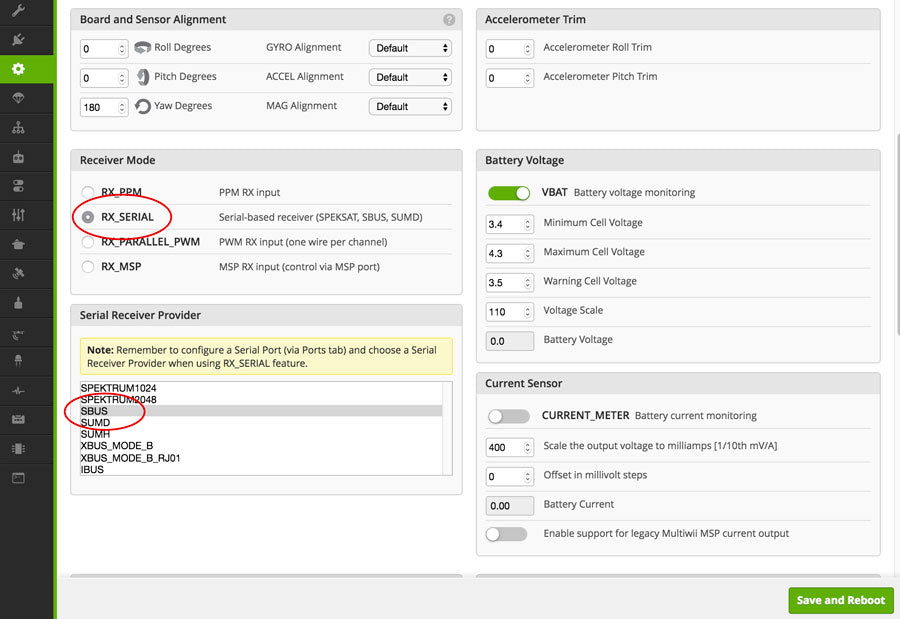
In CleanFlight on the configuration tab, select RX_SERIAL in the Receiver Mode. Select SBUS on Serial Receiver Provider and hit save.
On the Ports tab on UART2, change RX to Serial RX.

Bind the Taranis to the X4R-SB or XSR. Make sure you select Mode “D16” in the Model Setup page 2/12, not D8 like for the d4r-ii. Select “Bind” and the Taranis will start beeping. Hold the FS button on the rx while powering up. Unplug the power and exit out of binding on the Taranis. When you power the RX back up, the LED should turn green. Binding done and SBUS setup is done.
If you are upgrading the RX from PPM on the D4r-ii to SBUS on the X4R-SB or XSR on one of the kits from the store, all the RSSI and VBAT monitoring will work the same on the OSDoge. The setup is in CleanFlight and Taranis. Changing the RX doesn’t effect anything.
Smart Port and Telemetry
If you want to setup a ultra low profile quad or just a simple setup without OSD but still get RSSI and battery voltage warnings, using the Smart Port is the way to go. By using the Smart Port on the X4R-SB and XSR it will send telemetry (rssi, vbat, altimeter…) to the Taranis. From there you can set up the Taranis to alert you in a sexy woman’s voice when the RSSI or battery voltage drops below the threshold.
The Smart Port Telemetry setup on the X4R-SB and the XSR are the same.
Connect the RX using SBUS procedure above. In addition, connect the Smart Port wire (yellow wire) from the RX to input 5 and 6 on the Naze32.
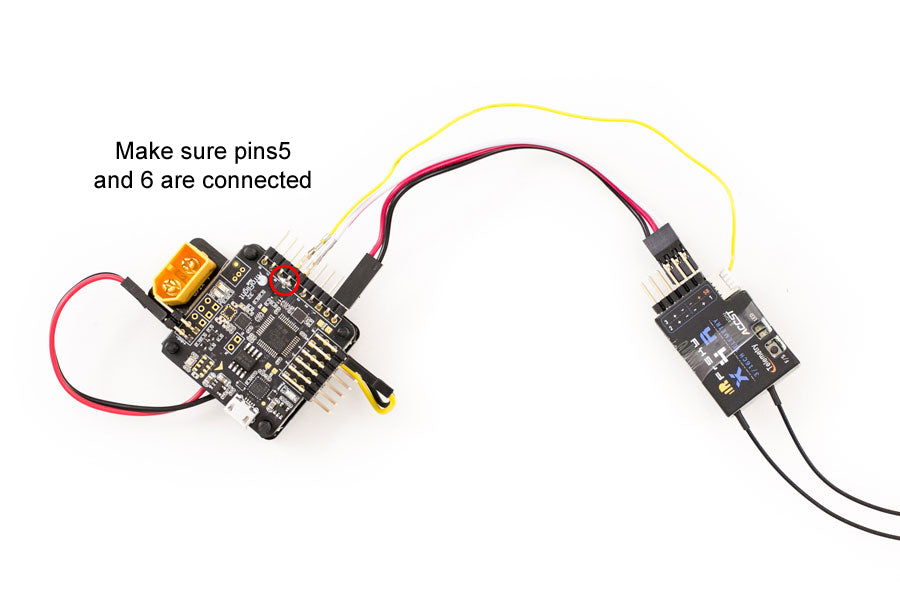
Important: On the Naze32 the yellow Smart Port wire must go to pins 5 and 6. The easiest way to do this is to put a solder bridge across pins 5 and 6. If this is not done, telemetry won’t work.
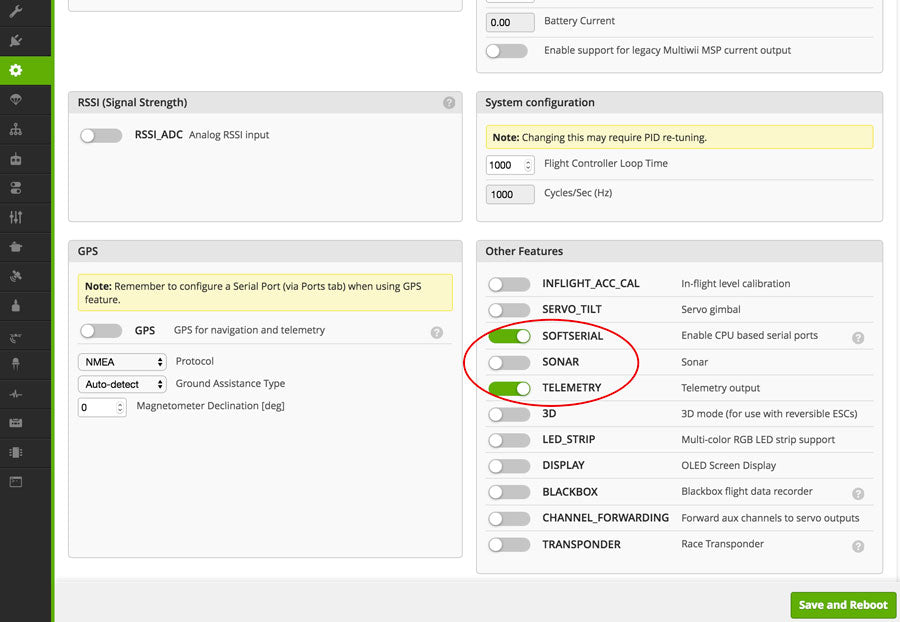
In the configurations tab, enable SOFTSERIAL and TELEMETRY. Hit save.
On the Ports tab on SOFTSERIAL1, select SmartPort on Telemetry. Hit Save.

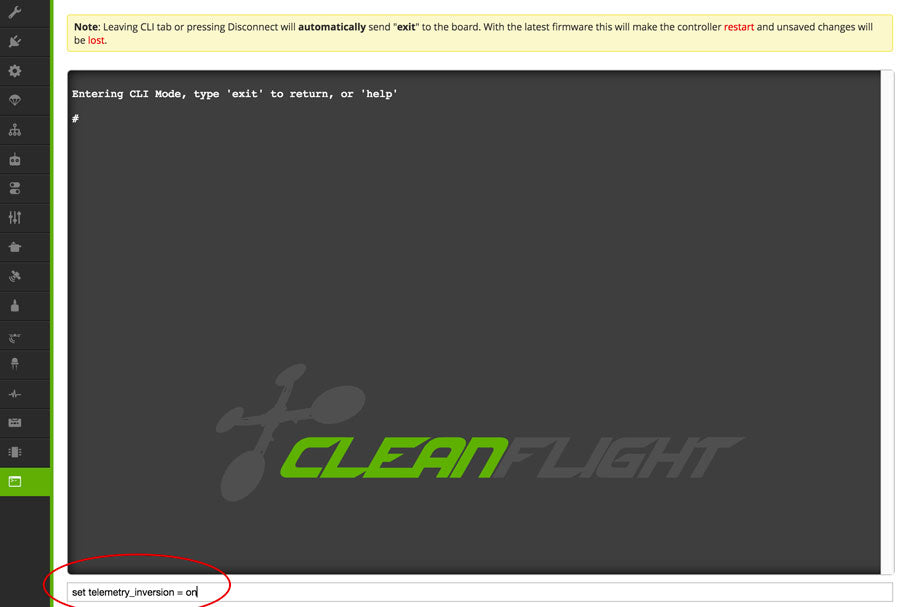
In the CLI tab, type command “set telemetry_inversion = on” then hit enter, type “save” enter.
Now the physical hookup and software is done, time to setup the Taranis. It will take forever to explain everything here so just watch the video. It will show you how to setup the Telemetry screens and setup voice alerts for low RSSI and VBAT.
Taranis Logical Switches
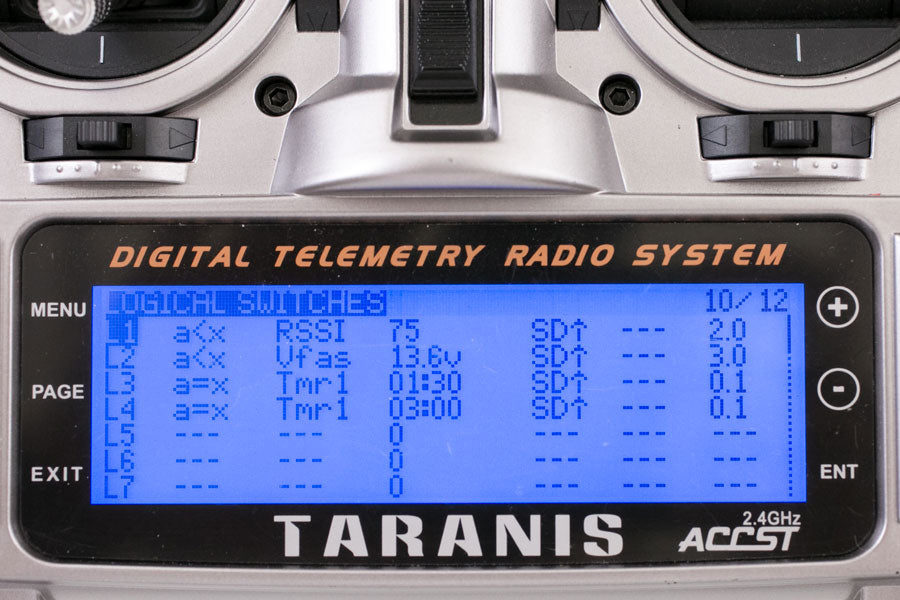
Here’s a quick explanation of how I have the Logic Switches setup
L1 – When RSSI value drops below 75 in the SD up position (my arm switch) for at least 2 seconds
L2 – When Vfas (VBAT) drops below 13.6v in the SD up position (my arm switch) for at least 3 seconds
L3 – When Throttle timer reaches 1:30 min in the armed switch
L4 – When Throttle timer reaches 3 min in the armed switch
Taranis Special Functions
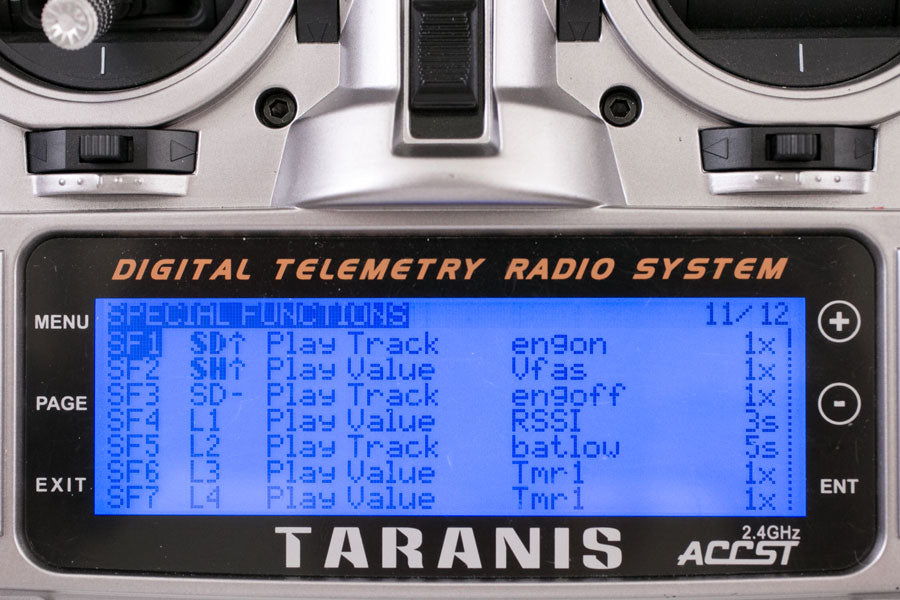
This is where you setup the voice prompts in the Taranis.
SF4 When the Logic for L1 is true, Play Value RSSI once every 3 seconds.
SF5 When the Logic for L2 is true, Play Track “batlow” once every 5 s.
SF6 When the Logic for L3 is true, Play Value 1:30 min once.
SF7 When the Logic for L4 is true, Play Value 3 min once.
UPDATE, 6/13/16 – I’ve confirmed that you can have the Telemetry from the SmartPort wire and OSD from the OSDoge working at the same time.
If you found this post helpful, it would be super cool if you purchased the components from my store or purchase items from my Amazon links. These posts are expensive and take a loooong time to make especially this one! Some of the segments in the video I had to reshoot 3-4 times because CleanFlight was messing up my screen recording and making the separate audio tracks not sync up. The purchases make it possible for me to keep making them. Thanks in advance, I greatly appreciate it 🙂

