PROton Long Range Drone 6s Build
This long range drone is such a fun and versatile quad. Instead of building two separate quads, one for long range and one for racer, this PROton build can be long range drone or racer just by switching out the arms, props and battery. It can switch from a 6s 5″ beast to a 5s 6″ long range drone in couple of minutes.
The parts used in this build were carefully chosen to be versatile, easy to build and high performance. By using the TBS Crossfire this will give you the range you need for long range flights. The Crossfire is good for racing also for it’s low latency. By going with the TBS Unify v3, the power can be adjusted from 25mw for racing or all the way up to 800mw for long range.
** 9/26/2019 UPDATE **
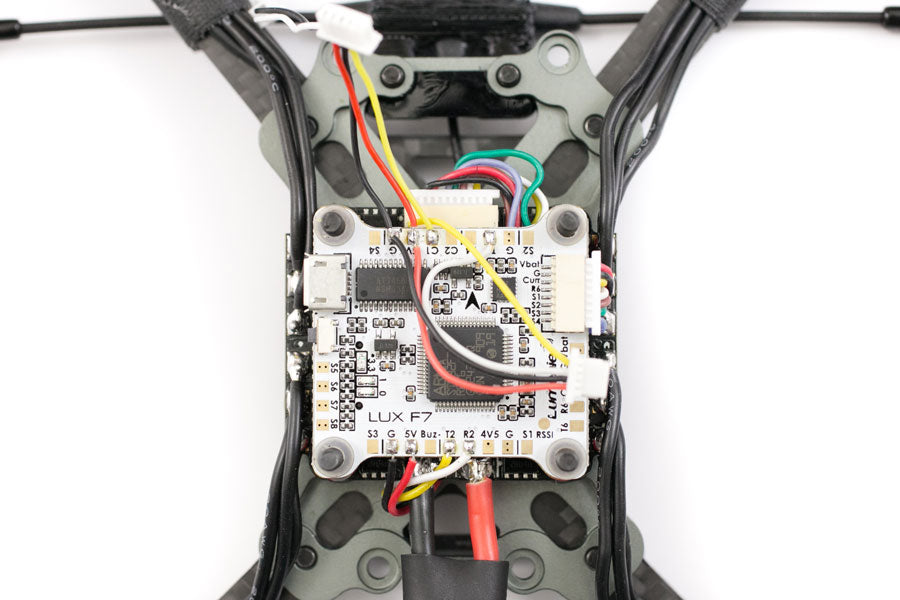
Since making this post the Helio Spring flight controller is no longer being produced and Butterflight has closed shop. No worries, you can use the Lumenier LUX F7 flight controller. The LUX F7 uses a super fast F7 processor and it has tons of UARTs for whatever peripherals you want to add.
The build is pretty much the same except for the flight controller. Here’s how you adapt the Lumenier LUX F7. You will need to re-pin the 8 pin connector that came with the LUX for the Aikon AK32. What you need to really pay attention to is that the Aikon AK32 uses a 10 pin vs the 8 pin on the LUX. Just make sure you insert the 8 pin to the 10 pin centered. Pin 1 and 10 on the AK32 wont be used.


Solder the Crossfire to UART2, Camera and VTX with Smart Audio on T4.

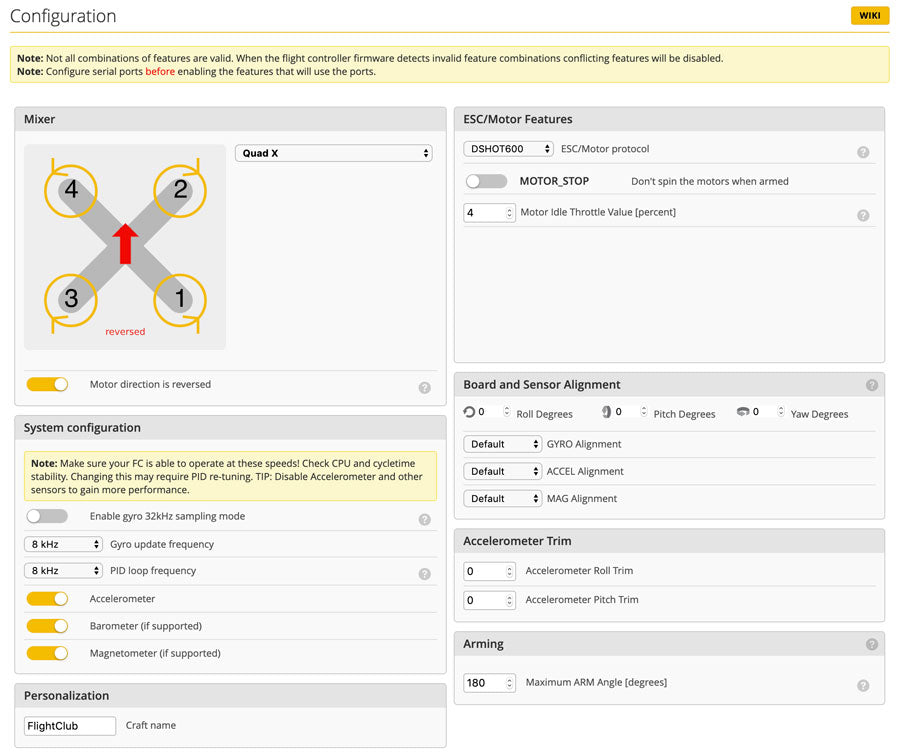
Instead of using Butterflight, which is no longer updated or supported, use BetaFlight.


Parts used in this build
- FlightClub PROton Skeleton
- 6″ Arms for 5s long range setup
- 5″ for 6s race setup
- TBS Crossfire Nano RX
- TBS Crossfire Micro TX
- Immortal T Antenna
- PROton Immortal-T Mount
- Tmotor F40 PRO v2 1600kv
- Aikon AK32 35A ESC
- Helio Spring Flight Controller
- Foxeer Arrow PRO
- TBS Unify v3 25-800mw VTX
- Lumenier AXii Stubby
- PROton GoPro Session Mount
- GoPro Session
A build kit is available for this build. It will include the cheat sheet, Taranis program file, ButterFlight program file (CLI dump) and all the small misc parts needed for this build.
Tools Used in this Build
- Weller Solder – I’ve had this workhorse for over 15 years. Still going strong.
- Gorilla Glue Heavy duty double sided tape – super strong double sided tape. Works even in the cold.
- Wagner Heat Gun for heat shrink – ditch the lighters. A heat gun will give you a much cleaner shrink
- Wiha Metric Hex Driver – my workhorse drivers
- Wiha wire stripper – love these wire strippers. it has a little screw that makes it easy to adjust for different size wires.
- Soldering Vise – Makes soldering boards easier
- Solder Wick – helps you clean up boo boos when soldering
- Butter Mount grommets – instead of nylon standoffs, these can be used to create a super low stack. can be cut in half to adjust for the perfect height
- Multimeter with continuity setting – a must for any quad builder
Other Recommended Parts Needed
Motors
On this long range drone build I’ll be using the Tmotor F40 Pro v2 1600kv motors. For normal 4s builds I use around 2400kv motors. On 4s that is equivalent to about 40k RPM (4s voltage 16.8v x 2400kv). On 6s it’s about 40k RPM also (6s 22.2v x 1600kv). I like 1600kv on this build because on 6s it’s plenty fast and efficient enough to use 1000mah 6s. For long range, a 5s 1800mah with 6″ props gives me around 6 min of light time. If you normally fly 2600kv on 4s, you may opt for 1750kv motors.
Why not just go with a 2400kv or 2600kv motor? If you want to fly only 4s, that’s fine. But you’ll only get around 3 min flight times and limited to only 5″ props.
Helio Spring
The Helio Spring may be the most advanced board on the market right now. It’s an F3 and F4 dual processor board that runs on Butterflight. There’s a reason it’s called ButterFlight. The PROton with the flight controller Butter Mount on ButterFlight flies just like it sounds. Sooo buttery smooth. Sometimes 6s builds can be tricky to tune. But this build on 6s even on stock settings is freaking smooth. Prop wash is non-existant. Punchouts are music to the ears.
It also has built in BetaFlightOSD which is essential in a long range drone.
Check out the Helio Spring Review.
Aikon AK32
I’ve been using this 4in1 ESC in pretty much all my builds. It’s rated for 35A constant, 45A burst and up to 6s so it can handle pretty much anything you want to do. The BLHeli32 on Dshot1200, 32/16k is super smooth. It’s a tank!
Let’s Build!
Build tip: if you’ve never soldered before, check out the post on Soldering School. It has some basic soldering tips. Only thing I would change is the iron temp. I leave my soldering iron temp at the max 850 F for everything. It doesn’t matter if I’m doing a big fat XT60 battery cable or delicate wires on the flight controller. What kills solder pads is the amount of time the iron is on the pad, not amount of heat. A super hot iron shouldn’t be on the pad for more than a couple of seconds for the job to be done.
For such a advanced setup, the actual build is very simple. All these parts were carefully chosen to be easy to build but also high performance. A huge chunk of the work was simplified by using the AK32 4in1 ESC and the Helio Spring in the wire harness.
Long Range Quadcopter 6s Schematic

Crossfire
On the PROton, there is a gap in the Nucleus plate under the first stack for the RX. It’s designed to be used with RX as big as the original crossfire RX.
The Crossfire is actually really easy to setup. I put off using it for a long time because it seemed confusing to setup. The manual isn’t great and the tutorials I’ve found online were hard to follow. There are 4 wires on the Nano RX. From top, CH2, CH1, 5V and GND. Power the rx with any 5V and ground. You can use any free UART on the board. On this build CH2 goes to TX3, CH1 goes to RX3.

Solder up the wires, attach the Immortal T antenna and heat shrink the RX. Looping the antenna like that lets you adjust the length of the Immortal-T wire.

Double side tape the Crossfire on the bottom of the AK32 ESC.

Put the silicon Butter Mounts in the Nucleus plate and the M3x20mm screws through the plate.

Once the ESC is mounted, install the arms on the frame.

Cut the motor wires and solder on the quad. The image above has extra motor wire because I want to be able to switch to 6″ arms. It currently has 5″ arms attached.

Use the PROton Crossfire antenna mount for the Immortal T antenna (prototype shown. final version will have holes to secure the antenna with zip ties).
FC stack
For the sake of this build post/video, I’ll do the physical build first, then flash the FC. But you should always flash the flight controller first before doing any soldering. Just to make sure there’s nothing wrong with the flight controller before doing any work on it.
The Helio Spring flight controller paired with the Aikon AK32 is a breeze to setup. Using the harness that comes with the Helio, it’s pretty much plug in play. All you have to do is rearrange the wires on the ESC side depending on the orientation of the ESC. The harness will power the flight controller, esc signals 1-4, ground and current sensor. Super clean and easy! Just follow the picture.
You could remap the motor outputs but for this setup you need to move the power, ground and current wire wire anyways. I find it much easier to just rearrange the motor wires this way.

This wire configuration is for the AK32 with the battery pad pointing towards the rear and solder pads down.
The Helio uses an 8 pin harness but the AK32 comes with a 10 pin. For this build you only need 8 middle pins. The image above is only using the 8 pin on both ends. If you want, you can de-pin the 10 harness that comes with the AK32 to do the rearrange. Just leave the top and bottom pins empty. If you decide to use the 8 pin on the AK32 side, just make sure you plug it in correctly. If you plug it in wrong, it will kill the Helio. For the sake of experimentation, I plugged it in wrong and it killed the board 🙂

This is what the harness looks like after it’s been rearranged. Black end is marked for the ESC side.

Solder the two jumpers circled in blue.
FVP
For the VTX settings we’ll use the built in BetaFlightOSD in the Helio to change vtx channel/band/power and PID settings. Connect the white SmartAudio wire to TX5. Solder the camera cable.

Solder an XT60 cable on the ESC. Since we are running this on 6s it’s a good idea to use a capacitor. The easiest way I’ve found is to put the cap directly on the XT60. Capacitors have a polarity so make sure it’s installed correctly.


Once the cap is installed, heat shrink the cap and XT60 together. At this point we are done with the physical build for this long range drone. For the sake of keeping the post shorter, this will be a two part post. Check back next week for part 2 of this long range drone build for setting up the Crossfire, flash ButterFlight, BLHeli32 settings and button up the build.
If you found this post helpful, it would be super cool if you purchased the components from my store or purchase items from my Amazon links. These posts are expensive and take a loooong time to make so the purchases make it possible for me to keep making them. Thanks in advance, I greatly appreciate it 🙂

