How to Build a Lumenier QAV-X
Time for another build! The Lumenier QAV-X build is one of my favorite quads right now. It’s no secret I really like the Lumenier frames. Their designs are all really well thought out using the highest quality components. The QAV-X is no exception. The frame comes in 3mm and 4mm versions. Both the frames are exactly the same except the thickness of the main bottom plate. The QAV-X is a true X pattern frame meaning the distance between all the motors are exactly the same. This makes it perfectly balanced on all axis and it shows when you fly. A really nice feature is the built in fixed 35 degree GoPro mount. The flight video is just a GoPro directly mounted on the frame with some velcro straps. It works great!
Testing
I built two QAV-X before I settled on what parts to use in this build. Let’s take a look at my two test quads.
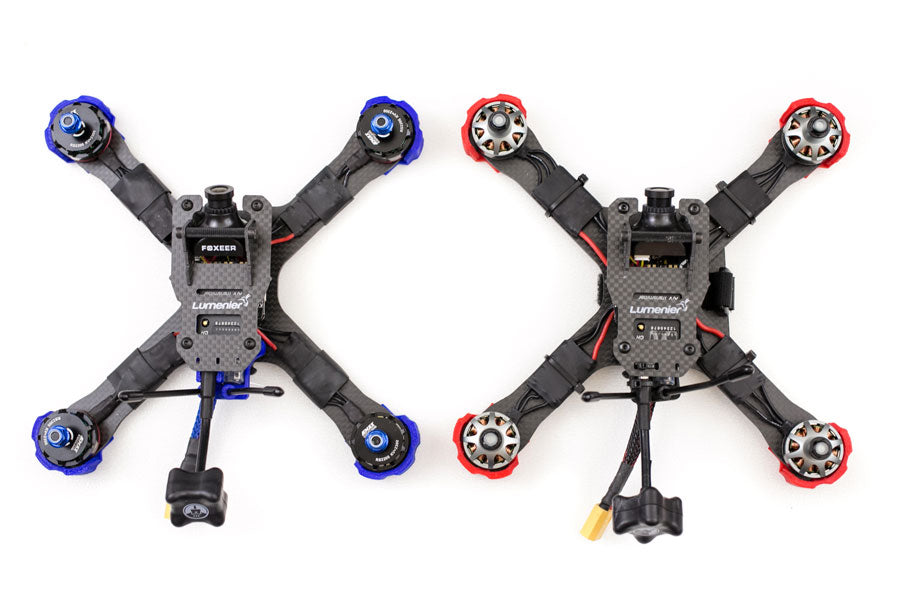
QAV-X Blue is running the KISS FC, DYS XS20A ESC running BLHeli-s and EMAX RS2205 2300KV motors.
QAV-X Red is running the KISS FC, KISS 24A ESC and Lumenier 2206 2350kv motors
*1/16/17 UPDATE
I’ve been using the new T-Motor F40 version II 2400kv and now this is what I run. The new version F40II are monsters. They are smoother and have noticeably more power than even the EMAX motors. Dont bother with the original F40, the F40II are now my new favorite motors.
After flying both quads I’ve decided to go with QAV-X blue. Both QAV-X fly very similar. Great control and balance with plenty of power. I was very surprised the XS20A flew just as well as the KISS ESC which cost double. Unless you plan on running ESC telemetry, I don’t see a need to run 24A esc on such a light quad. The Lumenier 2206 2350kv motors are great and run super smooth but the EMAX are hard to beat. Crazy powerful and cost less. One thing to keep in mind is the casing on the Lumenier motor is pretty thin on the bottom. That means less threads for the motor screws to grab. I had one motor come off the arm and ripped off the ESC after I crashed into a metal soccer goal post. How’s that saying go? If you aren’t crashing, you aren’t flying hard enough? Or I just suck at flying…
So QAV-X build red is no better or worst at flying but QAV-X blue costs about $85 less. Your choice. Both QAV-X are built almost exactly the same. If you build with KISS FC and KISS ESC you can skip the ESC calibration part.
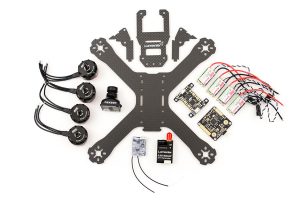 Parts used in this QAV-X Build
- Lumenier QAV-X 4mm
- KISS FC
- DYS XS20A
- EMAX RS2205 2300KV
- HS1177 Camera
- FrSky XSR
- PowerOSD PDB
- Lumenier 600mw VTX I put a 200mw VTX on one of the QAV-X and it flew fine. If you race you’ll want to use a 200mw max power vtx.
- TBS Triumph Antenna or Foxeer Antenna (These gave me just as good of a image as the TBS antenna. Pick up a backup antenna.)
3D Parts
The QAV-X Build Kit will include everything listed above plus a bag of misc parts (heat, shrink, buzzer, vbat cable…), backup files for the Taranis and KISSFC and the cheat sheet.
Tools Used in this Build
- Weller Digital Soldering Iron – Workhorse soldering iron that will last you years. Mine is 15 years old!
- Soldering Vise – Versatile vise to make soldering jobs easier.
- 60/40 Rosin core solder .32 diameter
- Tweezers
Suggested Other Parts Needed
- FatShark Dominator SE
- DAL T5045 Tri-Blade props
- Tattu 4s 1550mah batteries
- HiTec X4 4 Port Charger
Let’s get the QAV-X Build On!
Just a quick note, if you are using this guide to build with parts you bought from another retailer which is fine, but please contact them for support. I can only offer support for my customers. Otherwise I’ll be answering emails all day long. Thanks for understanding 🙂
If this is your first quad, check out my other post on soldering basics. Also I highly recommend building the quad yourself rather than buying a pre built quad. Part of flying FPV is crashing. There’s no better way to learn how to repair a quad than building it yourself. This guide and kit will be the easiest best way to learn how to build a QAV-X.
The QAV-X is a small frame so there’s not much room to work with inside the quad so direct solder is the cleanest way to build. Everything in this QAV-X build will be direct solder. This will help reduce problems that can arise by eliminating the possibility of connectors coming loose. There’s not really any room for header pins and connectors. This frame uses 27.5mm standoffs rather than the standard 35mm so it will be a tight build. Get a nice pair of tweezers.
Build Schematic
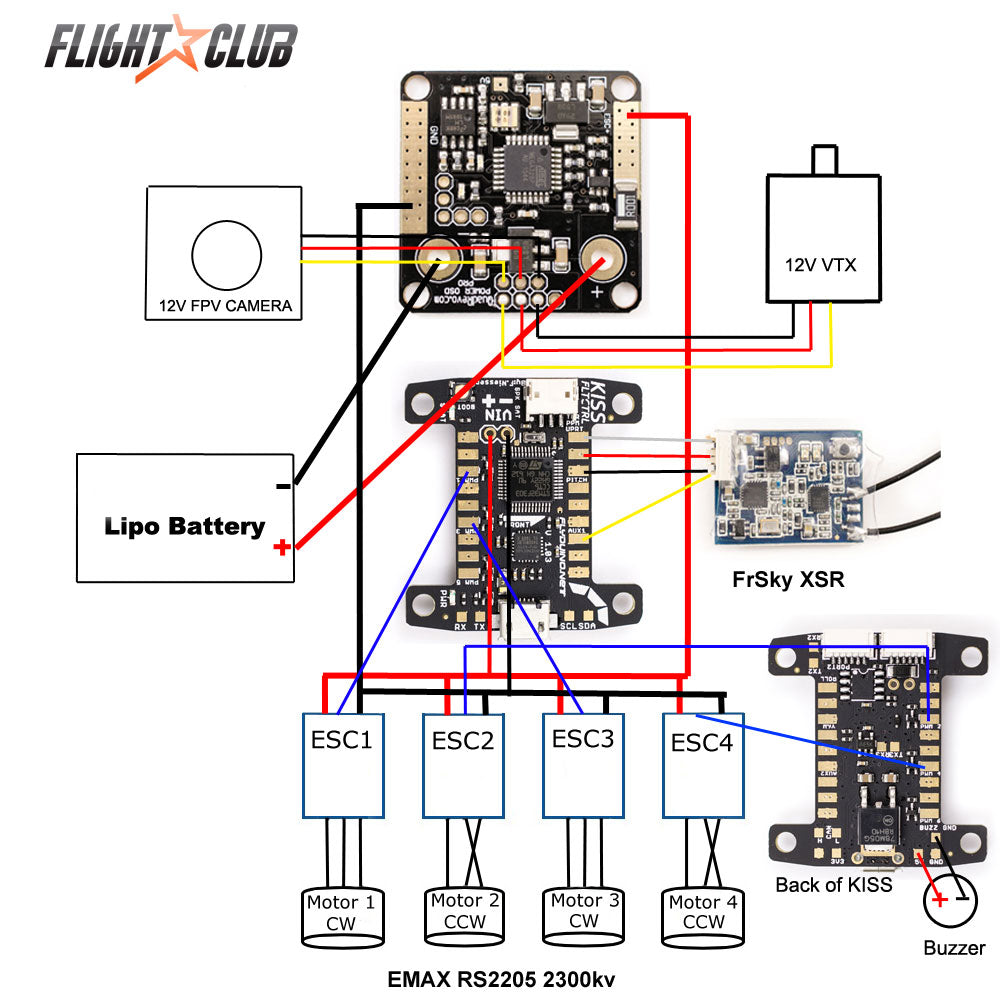
So here is the schematic for this build. If you get lost during the build just refer to this schematic and it should clear things up.
Once again, a lot of the steps I do are not totally necessary. I do them because I’m OCD when it comes to my builds. I value clean builds because it makes troubleshooting easier and looks better.
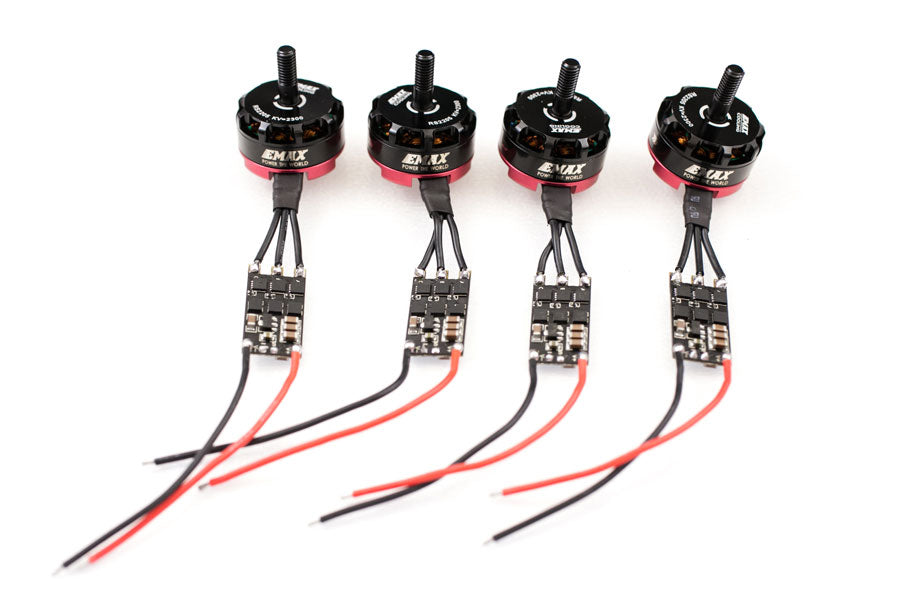
First prepare the ESCs for mounting. Remove the heat shrink and unsolder the signal and ground. Cut the motor wires and pre-tin the leads and ESCs with solder. Pre-tinning makes soldering much easier. Solder two motors on the ESC straight across and two with a crossed wire.
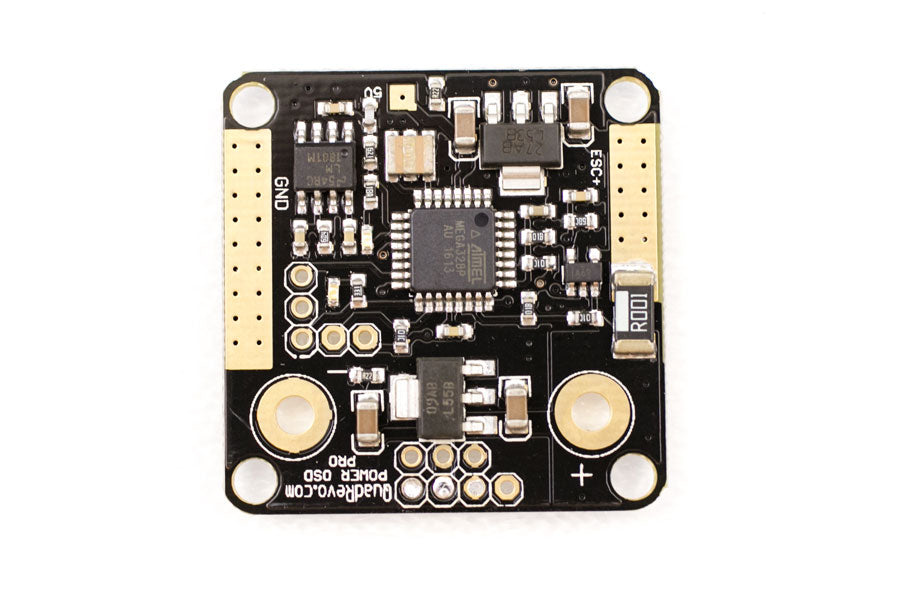
Since everything will be direct solder on this build, we need to remove the header pin on the PowerOSD. Clip the headers and remove the pins individually while the solder is melted.
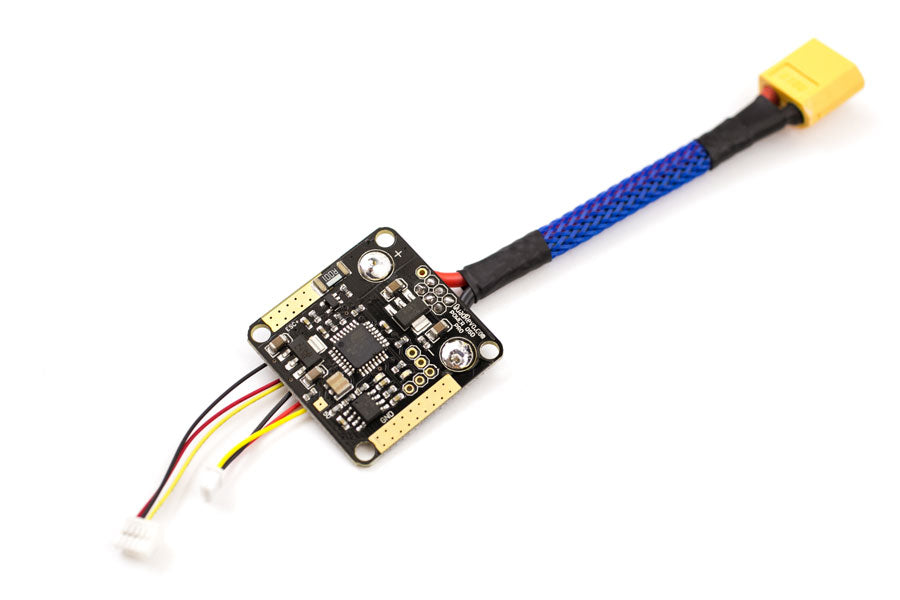
Cut the camera and VTX cable and solder them to the PowerOSD on the bottom. Solder on the battery cable on the bottom also.
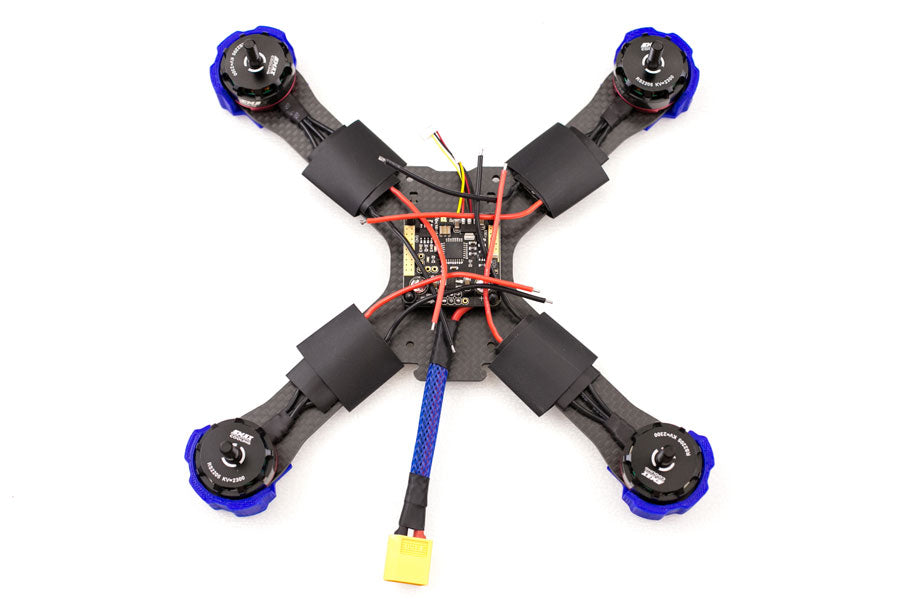
Slip the ESC and bigger arm heat shrinks on. Install motor motors on the frame with motor guards if you are using them. I highly recommend using motor guards on this frame because it’s an X pattern frame with short body. That means when you fly into something the motors will be the first thing that gets hit.
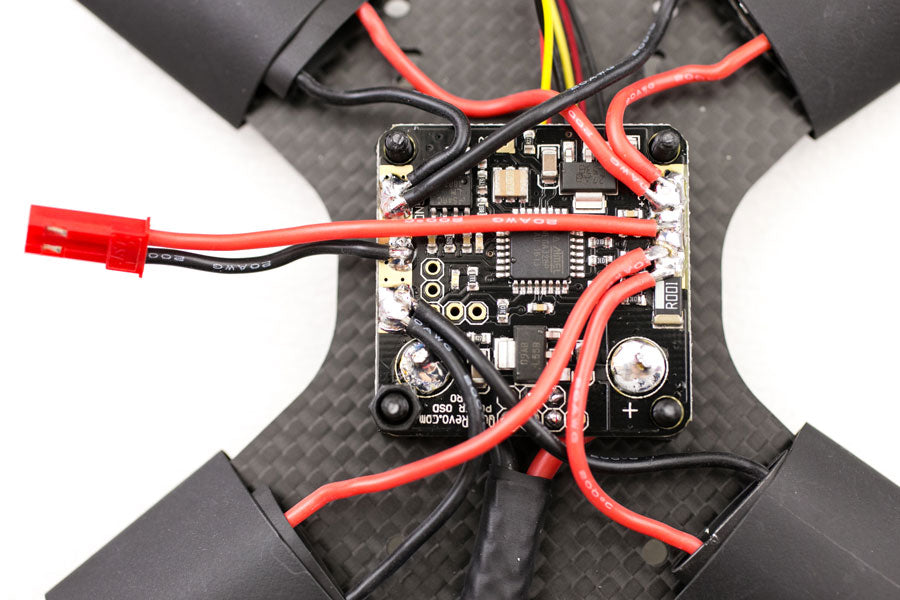
Solder on the ESC power leads on the PowerOSD. All the positives on the right pad and negatives on the left pad. I find it easiest to solder the ESC power cables two at a time. Cut and install a VBAT cable for the KISS FC.
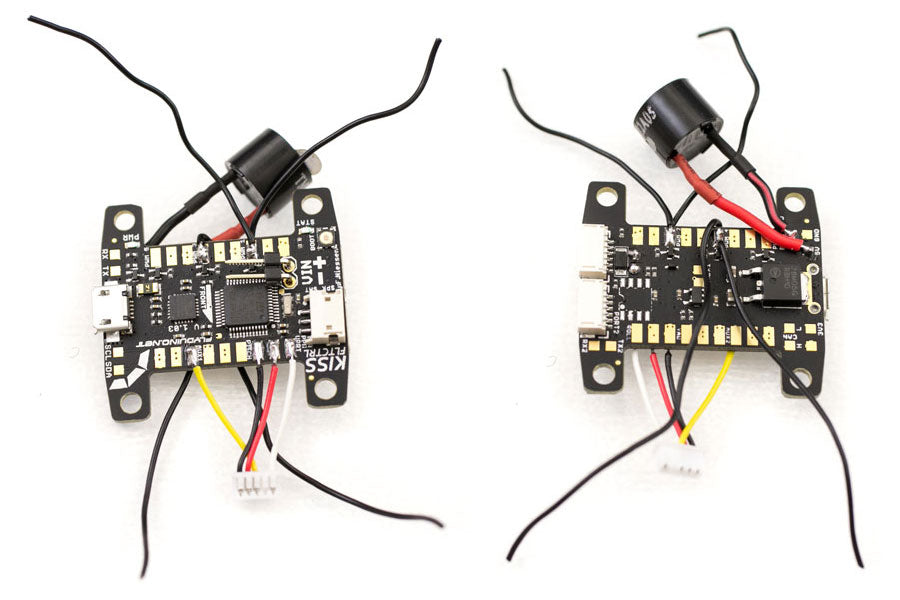
Cut the wires on the FrSky XSR and solder on the KISS. Add a 2 pin 90 degree header on top of the KISS FC, buzzer and ESC signal leads 1-4.
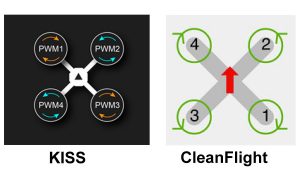 Mount the KISS FC and solder on the signal leads. Pay attention to the motor layout. The KISS layout is different from CleanFlight.
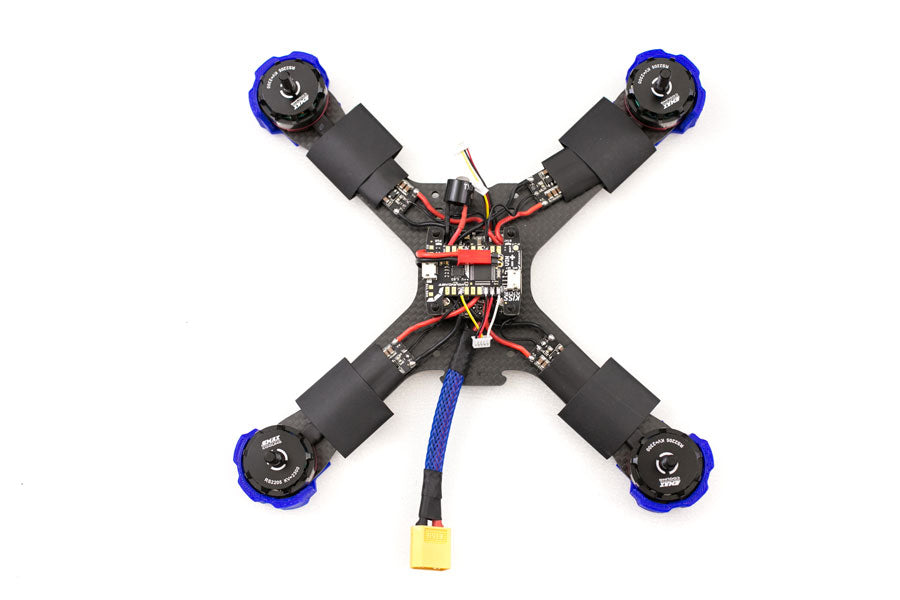
At this point you are done with all the soldering. Easy enough right? Do not close the heat shrinks just yet. You will do that after you verify the motor spin direction. The KISS FC needs the XSR bound and the Taranis switches set up before you do the settings in the KISS Configurator. Check back for part 2 of the QAV-X build soon for the Taranis setup, KISS Configurator setup and test flight video.
If you found this post helpful, it would be super cool if you purchased the components from my store or purchase items from my Amazon links. These posts are expensive and take a loooong time to make! The purchases make it possible for me to keep making them. Thanks in advance, I greatly appreciate it 🙂

