Soldering Tips : 11 Soldering Tips to Instantly Improve your Skills
Whether you are building your first quad, scared of messing something up or just unsure of your soldering skills, follow these 11 soldering tips to instantly improve your skills!
If you are brand new to soldering, first check out the soldering school post to familiarize yourself with the basics and other soldering tips.
Soldering Equipment
You need three basic items to solder electronics.
- Soldering Iron
- Solder
- Some kind of smoke extraction
Any soldering iron will work as long as it can get hot enough (800 F). A cheap soldering iron will get the job done but if you plan on doing a lot of soldering I’d recommend getting one with at least a on/off switch and adjustable temperature.
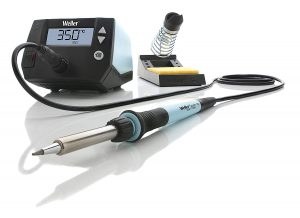 A good soldering iron will last you a lifetime and make soldering cleaner, easier and fun! I’ve had my Weller WESD51 for over 20 years and it’s never let me down. If you take care of your tips they will last a loong time. It’s an older iron so there’s no auto power off. I left the iron on overnight once and it destroyed my tip.
If I were to buy a soldering iron today it would be the Weller WE1010NA. It’s a 70w digital soldering iron with the auto off.
Use a rosin core solder so you don’t have to use messy flux. This type of solder has a hollow core filled with rosin. Rosin is a type of flux. When the solder melts, rosin comes out and fluxes the solder to help it melt faster.
Solder contains small amounts of lead so you don’t wanna breath in the nasty fumes. Use something to prevent the smoke from directly going up your nose and eyes. An activated exhaust extractor works great but even a simple fan to blow the smoke away will suffice. I use this fan that has an USB out with a 6000mAh battery so you can charge a battery or hook up an LED light.
Nice to have tools
- Soldering Vise – small clamp to hold components to make soldering easier
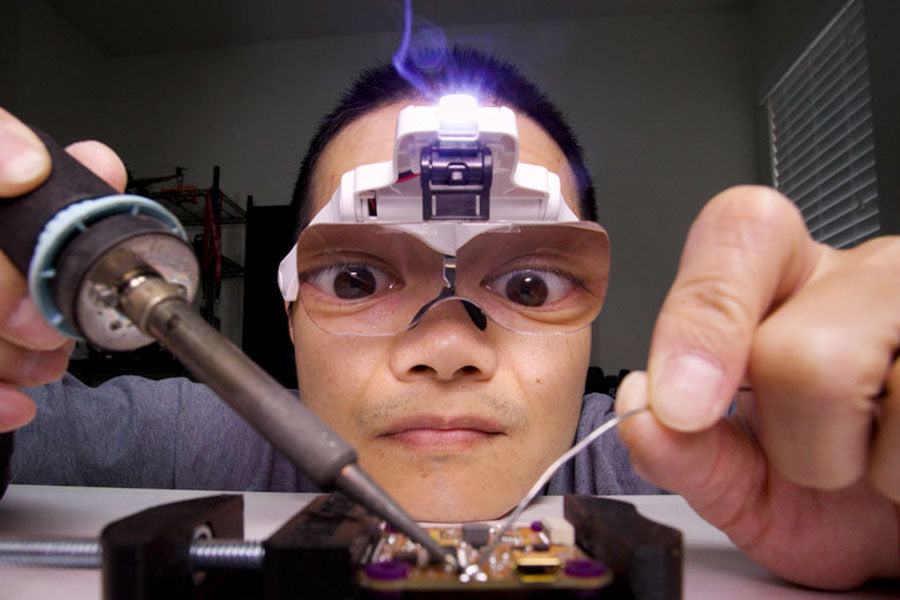
- Magnifying Glasses – if you have old eyes like me, these glasses make it easier to see up close
Tip 1 : Start with a Clean Tip
A clean soldering tip will transfer heat faster and keep solder joints clean. Simply use a damp sponge or coiled wire ball to wipe the tip before soldering and after use. Storing a clean tip will help prolong the life of the tip. If in a pinch like if you’re doing a field repair, just tap the tip to remove excess solder.
Tip 2: Use a Cone Tip
A wedge tip is good for batteries, motor wires but suck for fine soldering like camera wires. Forget about replacing micro surface mount components.
A cone tip is good for batteries, motor wires but great for fine soldering and can do fine surface mount components. For big battery cables just use the flat part 5mm above the tip.
A cone tip is an overall more versatile soldering tip.
Tip 3: Pre-Tin
Pre-tin all wires and pads prior to soldering. Melted solder will bond to solder instantly much faster than solder to wire. It makes everything so much easier.
Tip 4: Use High Heat
What destroys battery pads is time of heat, not amount. 800 degrees works for battery cables all the way down to fine wire soldering as long as it’s done quickly. For bigger jobs 850 degrees is better if your iron can do it.
Tip 5: Use Short Time
Use the shortest time as possible – using the high heat it allows you to melt solder quickly so you can get the job done quickly. Just remember, you want to use high heat with short time, not low heat for a long time. That’s when solder pads get destroyed
Tip 6: Small Wire
To solder small tiny wires like camera wires, make sure the pad and wire are pre-tinned. Melt the solder on the pad and then quickly push the wire into the melted solder, remove the heat and hold the wire steady until it cools. This should take less than 2 seconds.
Tip 7: Medium Wire
For medium gauge wire like motor wires, it’s similar to the small gauge wire, motor wires. Pre-tin wire and pad. Melt the solder on the pad then place the wire where the melted solder and iron tip meet. When the solder melts, remove the iron and hold the wire still until the solder cools. This should should take less than 3 seconds each.
Tip 8: Big Wire
This one scares people most but it’s not that hard. Do this one wire at a time so you can keep the solder hot. Pre-tin wire first, then pre tin the pad. While the solder on the pad is still liquid place the wire in the solder where the tip is. Hold the wire until all solder is melted, remove heat and hold wire motionless until it hardens.
Tip 9: Too Little Solder

Using too little solder the joint can come off the pad. A joint that doesn’t have enough solder will look bumpy or you can see the strands of wire. To fix this just add a little more solder.
Tip 10: Too Much Solder

Too much solder isn’t a good thing either. A solder job that has too much solder will look spiky or a big blob. You don’t want this cause these spikes and blogs can cause shorts. Use solder wick to remove some solder or simply use the iron to wipe away some solder.
Tip 11: Cover Components
Tiny solder balls can form when solder is melting. Use tape to cover up components to prevent shorts. These tiny solder balls can shoot all over the place landing on small leads, causing shorts or other malfunctions.
Follow these 11 soldering tips to instantly improve your soldering skills. Go build a quad!
If you found this post helpful, it would be super cool if you purchased the components from my store or purchase items from my Amazon links. These posts are expensive and take a loooong time to make so the purchases make it possible for me to keep making them. Thanks in advance, I greatly appreciate it 🙂