Soldering Iron School : Learn How to Solder the Right Way
Soldering Iron School
Learning how to use a soldering iron is an important skill in building FPV race drones. I know there are a lot of people who want to build their own quad but are hesitant because they’ve never soldered before. It’s actually really simple and a lot of fun once you learn the basics. I’ll show you how!
What is soldering?
Soldering is a process in which two or more metal items are joined together by melting and flowing a filler metal (solder) into the joint, the filler metal having a lower melting point than the adjoining metal. (wiki)
There are many ways to solder. This is the way I was taught in school. After getting my electronics engineering degree I worked at Nokia repairing and soldering microscopic SMD components on cell phones for two years.
Equipment

SOLDERING IRON – There are several types of soldering irons but the best are the ones that you can adjust the power. I use the Weller EC2002m which I got when I was in school 20 years ago. The newer version is the Weller WESD51. The main difference is that the WESD51 is 50w vs 40w and it has a auto shutoff feature. I wish I had this. I’ve accidentally left mine on for hours before, oops. Having a digital display that tells you exactly what temp you are using is very useful.
If you don’t solder everyday like me and don’t need a fancy digital one, they make a analog version, Weller WES51. It’s around $100. If that’s still too much they make an adjustable 40w soldering iron for under $40, Weller WCL100.
If you are looking for a soldering iron to get the job done, they have a $9 60w soldering iron. I would not recommend this one. I’ve used these when I was younger. They have two settings, off and 860 degrees. 860 degree is good for melting wire, burning holes in wood and frying ants. I never go that hot on my iron.
Why the big price difference you ask? We’ll I’ve had my Weller soldering iron for over 20 years and I bought it used from the school when they were replacing them. I’m still using the original tip! So they will last a loooong time if you take basic care of them.
SOLDER – There are different types of solder for different jobs. I find for building quads, rosin core 60/40 (60 tin/40 lead) .032 diameter solder works great. It’s thin enough to work on tiny jobs like Naze32 headers and works great for fat battery cables. It flows easily without the need for messy flux.
SOLDER WICK – This acts like a sponge that sucks up hot solder. A simple 2.5mm wick works great for quad building.
Here’s a soldering vise I designed. It makes soldering much easier.
How to solder
Soldering is easy. The main objective is to heat up two metals hot enough to melt solder so they join together when they cool. When you apply the soldering iron tip, make sure you touch both metals.

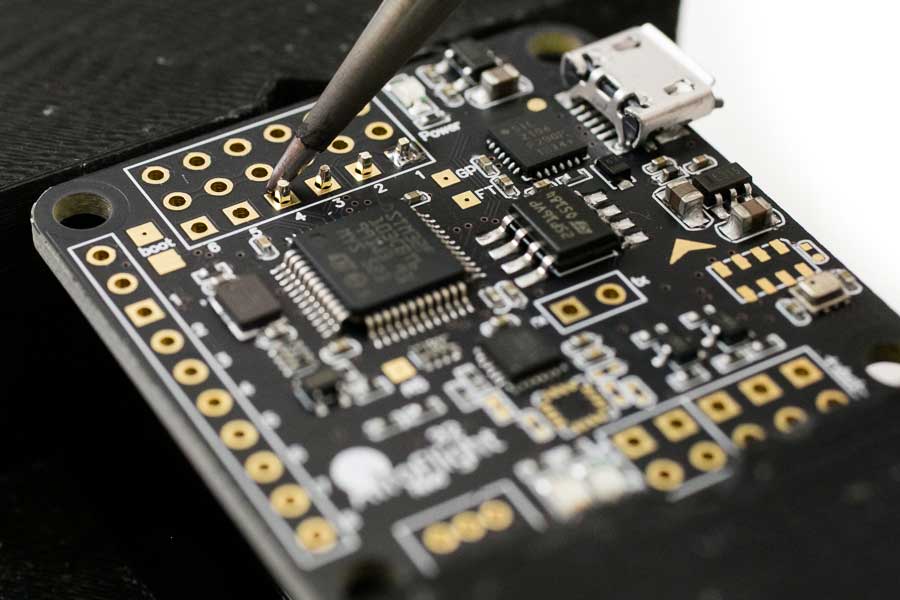
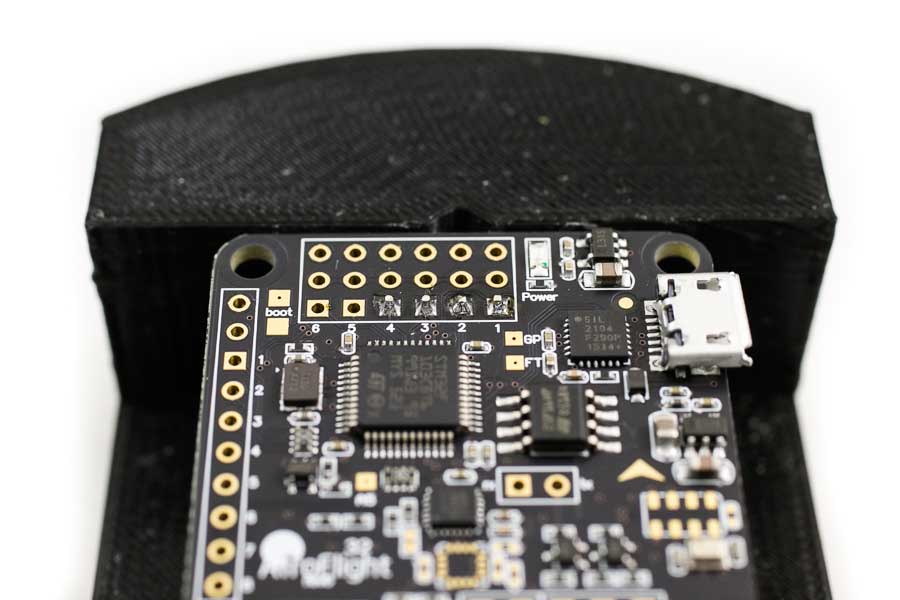
For instance, if you are soldering a through the hole joint like a pin header to a Naze32 pad, make sure the tip is touching the pin header and the pad at the same time. You want both metals to be heated enough so that it melts solder. That way the solder will melt and bond to both parts. A good through the hole joint will look like a little volcano and is shiny. This type of joint doesn’t require tinning. Tinning is putting a little bit of solder on both parts before soldering them together.
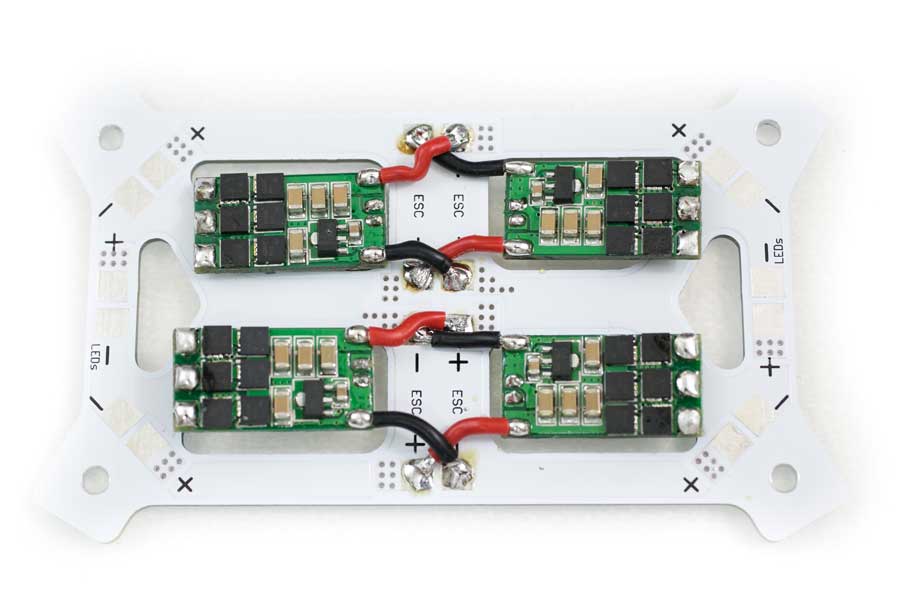
For soldering wires on a PDB (power distribution board), tinning should be done. Tinning the wire and pad makes it easier for this kind of solder joint. Again, you want to touch the pad and wire at the same time to make sure both are hot enough to melt solder. After the solder is melted, try not to move the wire until the solder hardens. If you do you might end up with a cold solder joint. A cold joint will look dull and bumpy. If it looks like that, redo it. The wire could come apart while you are flying.
Here’s a guide on temperatures:
- 600 degree – delicate jobs such as joining two small gauge wires together
- 675 degree – pin headers on a flight controller, through the hole type joints
- 725 degree – soldering ESCs on a PDB
- 800 degree – soldering 16AWG wire on XT60s or fat battery cables
You want to strike a balance between getting the job done while not causing any damage like melting wire, applying so much heat that the solder pad comes off or damage surrounding electronic components.
Soldering tips:
- Soldering can get messy and ruin your tabletop. Use a workstation pad like this Silicon soldering pad. This is a great pad with all sorts of compartments to help organize screws and tools.
- Unless you are in the act of soldering, don’t leave hot solder on the tip. A simple tip cleaner will work as a soldering pad. Wipe the tip on the cleaner before and after each solder joint, especially after. Leaving hot solder on the tip is the best way to shorten the life of the tip. That’s really all you have to do to take care of the tip. My tip is over 20 years old and still works great.
- Wipe the tip before using. A bright shiny tip works much better than a dirty tip.
- Use a small conical tip. These work equally great for precise jobs like pin headers or fat battery cables if you know how to use it. (Watch the video)
- If you get a stubborn solder joint that won’t melt, put a tiny bit of solder on the iron tip. The melted solder will increase the surface area of heat and melt the stubborn joint.
- Breath out or lightly blow on the melting solder. There are some nasty metals in solder. You don’t want to breath it in.
- Wash your hands after handling solder. Lead is nasty.
Hopefully this little tutorial will give you some confidence to get started. Once you get basics it’s pretty fun. Like everything else, the more you do it the better you get.
Build Fly Crash Repeat
If you found this post helpful, it would be super cool if you purchased the components from my store or purchase items from my Amazon links. These posts are expensive and take a loooong time to make so the purchases make it possible for me to keep making them. Thanks in advance, I greatly appreciate it 🙂